 I love garbanzo beans.
Pressure canning garbanzo made perfect sense to me. This was a really easy project. The way's to use them after you have canned them is endless. If you just happen to be the one person who does not care for this little beans I am going to convert you today.
I am really glad to have learned how to pressure can. It was a big fear at first now I look for foods to preserve and know what is in the jars. It sure saves a trip to the store when I am in need ingredients for a food project.
Ingredients
5 pounds of soaked beans this started as 3 pounds of dry
1 quart + chicken broth
1/4 teaspoon of lemon pepper per pint (or any seasoning you prefer)
Garlic clove 1 per pint or to taste
This will provide you about 8 pint jars
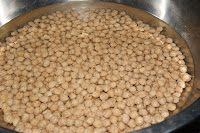
 Clean and Soak your beans overnight. This is in my opinion one of the most important things to do when processing beans. Unlike the other beans we have done these guys are pretty clean. I changed the water only once. They did not expand as much as the other beans either.
 Once the beans have soaked clean them and put them into a large
stainless steel stock pot. Cover the beans with water so they are cover
by one inch.
Once the beans have soaked clean them and put them into a large
stainless steel stock pot. Cover the beans with water so they are cover
by one inch.I also added a quart of chicken stock to this mixture. I use chicken broth because it give a great taste with any dish you may be creating. You can use just plain water should you not desire the broth.
Once the beans are cover let them come to a low boil for 7 to 10 minutes. Never bring any beans to a rapid boil all beans can split or loose there skins. Makes the final product mushy. But if you are going for soup what the heck! Now after 7 to 10 minutes turn the burner to low and let them sit for an additional 10 minutes. This give you the time to get all your stuff ready to pack the jars.

The beans will create a foam on the top once simmered. It is familiar to the foam you get from preserving jams. Just scrap the foam off when you are ready to jar your beans.

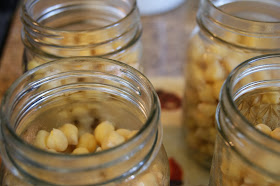
 I have decided to use pint jars for this project.
Here is the beans in the stock after scraping off the foam.

Fill your jars with beans. Use a slotted spoon it makes it easier. Only fill until your jars are approximately 3/4 of the way full. They will expand and need room.

Now add you seasoning just prior to adding the liquid. Be creative and use the seasoning that appeal to you. Use only a 1/2 teaspoon until you know how they will taste after.

Keep the liquid at least one inch to one and a half inch's from the top of the jar. Wipe the rims of your jars. Add the metal lids, and tighten the rings. Make sure you pressure cooker is hot and the seals of your jars are secure.
If you add 2 tablespoons of white distilled vinegar to the water it will prevent a white film that comes from the process on to the jars. No harm no foul.
Add the jars one by one making sure they do not touch.

Process your jars at 11 pounds of pressure. Pint's for 75 minutes and quarts for 90 minutes. Once this time is done let your pressure canner cool completely by letting the dial gauge drop to zero. Carefully take the gauge off and take the top of the pressure canner off. Please make sure you take it off facing away from your face so the steam does not give you a super spa facial.
Let the jars cool for 15 more minutes prior to taking them out. Let them cool overnight or until they are completely cool. Once cooled remove the twist portion of the top and clean the jars. Label with contents and date and store in a cool dry area. Once opened refrigerate.
* Pressure Canning Website I use is the Presto.
Disclaimer: This is not an all inclusive recipe for making jam. You should have a basic knowledge and understanding of the canning process before proceeding. Please consult your local Agricultural Extension Service for additional information and available classes.
Looks great! So, how many pint jars does this make?
ReplyDeleteThis made me approximately 9 pints. I added dried Jalapenos to the last three . xoxo
Delete