First the measuring you want to measure your beans dry. Most recipes will call out by the pound and most bagged dry beans come in bags.
I did:
3 lbs of beans to get you 8 pint jars
Or you can do :
5 lbs of beans for 7 quarts
I have started to do all my beans in quart because we always want more.
Put dried beans in a large mixing bowl add water to cover beans by 2 inches. Rinse them until the water runs clean. Remove any debris or floating beans. Take your beans and put them into a large pot and boil for 2 minutes. Remove them from the heat and allow your beans to soak overnight. Adding water when needed. You are re-hydrating your beans.
 |
| Rinsed beans |
Put dried beans in a large mixing bowl add water to cover beans by 2 inches. Rinse them until the water runs clean. Remove any debris or floating beans. Take your beans and put them into a large pot and boil for 2 minutes. Remove them from the heat and allow your beans to soak overnight. Adding water when needed. You are re-hydrating your beans.

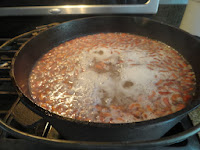
The beans have plumped up now, discard the water they have been sitting in. Put the beans into a large pot and cover them with liquid plain water or a broth is fine. Keep them on simmer for at least 30 minutes, stirring frequently. (Hard boil tends to split beans.)

Fill your jars with the beans to 3/4 full then add the liquid the beans simmered in to leave one inch of head-space. You can add 1/4 teaspoon of salt per pint and a teaspoon per quart. This is an option not mandatory. I do not add salt. But what I do do depending on the beans is on the final simmer I add equal parts water with chicken or beef broth I have made. It gives the beans great taste.
You leave the one inch of head space because the beans have a tendency to grow even more! Little devils.

Your water in the pressure canner should be hot and at least 3 inch's deep.Using your tongs carefully place your jar's into the pressure canner. Bring the pressure canner to a steady steam flow for 10 minutes it clears the air out of the canner.
Once 10 minutes has passed pop on the pressure cap and pressure for 75 minutes at 11 to 13 pounds of pressure for pint jars and 90 minutes for quarts.
Once the time has passed let your canner cool until the presume is down to ZERO and the steam cap has fallen. Remove the steam cap and then carefully turn and take your top off tipped away from you. Let the jars sit in the cooker for about 15 minutes then remove and place on a heat safe counter and let them cool for 24 hours. Once cooled room let the twist part of the top wipe clean and store in a cool place for up to 9 months.
 |
| I added some of my dried jalapenos to half the jars yummmm |
Optional add-on:
Garlic, onions, jalapenos or red crushed peppers the kind you use on pizza. I used a vegetable broth that I had in the freezer to give them a little more taste. Get creative please. Enjoy
The sites I went to to research the recipes are Pick your own my "go to site" and SB Canning. I think Pick your own was just a bit more detailed.
Disclaimer: This is not an all inclusive recipe for making jam. You should have a basic knowledge and understanding of the canning process before proceeding. Please consult your local Center for Home Preservation for additional information and available classes.

No comments:
Post a Comment
We love to answer your questions and hear from each and every one of you