Showing posts with label DIY. Show all posts

2.07.2013

DIY Soap Dispenser


Yes this is my helper "Pa" he is the go to guy for most of my "Projects"

I had seen this one on the Internet so many times but never tired it until now! I am trying to get off the plastic but it is daunting and almost impossible. Everything is in plastic. But on we tread!I found a couple of different way of doing it. One was a bit complicated because you needed to take the old screw top from your last plastic jar, cut it glue it blah blah.  But it works ! In my opinion this limits the size of squirt top you can use. I wanted something permanent and wanted to use the can top to open and close. What ever!


Now I went to another site that did it the same as me with a glue gun. She made a good point to seal the hole and she to used a glue gun. But here is the problem and I am taking pictures today a week after I have had my jar in use. It still rusted the glue from the glue gun did not adhere after all I think because of the moisture and movement. So I have to try something else to seal it. The search continue. Or maybe not even seal it. Keep reading you will see why and how'z


The first thing is get your stuff. You need a one clean  mason jar, a clean mason lid and a rim to secure the lid. To make the hole was really easy. I had Pa out there with his drill and tools. We laughed the mason lid is so soft you can actually just pierce it and use some needle nose pliers to shape the hole.


Have your glue gun ready to secure your spout. I put 40 gallons of hot glue BUT take note a few weeks later the glue came loose. So I am going to tailor it now to use

These two pictures are of the container two weeks after I made it. Notice the rust? I think it is because the water /soap got caught between the glue stuff and the lid. I took the glue off then I washed and dried the lid and just placed the top back on. I will see if this helps. 

I am finding that all things DIY are really a lesson in action. Everything I am learning to make myself always needs a little tweaking.


Ok it is back on the counter and ready to reuse. I will keep updating you! xoxo


2.05.2013

Homemade pectin or not


So making your own pectin this is something I learned how to do when I went to a class about Marmalade at June Taylor in Oakland.

It was a great class because she focuses on strictly citrus. Of all kinds.


I really enjoyed the class. The one thing I did not like was no Pictures. No shit good! But that did not deter me from trying this new lesson at home. Always have cheese cloth on hand as jam maker. It will come in handy with so many of your recipes. 


So to start you take the pith , guts and seeds and all things you do not want in your jam. Put this into the cheese cloth. I double up the cheese cloth and tie it with some cooking twine.
Do not use the yellow part of the peel this is good for other uses. Like candied Peels.


How much you use is a good question June used 500 pounds in her 30 quart pot's. LOL large batch. I thought I made large batches but this is large. Just use all the pith stuff you have from the recipe you are making it is all relative. For my Orange Marmalade I got about 4 cups of pith and seed.

 
So you drop you bag of pith and seeds into your pot of boiling jam. Let the pouch simmer with your jam. Marmalade is a boiling point jam which is another subject.


The real fun is waiting for the bag to cool so you can squeeze it. I have gotten myself a pair of heavy duty rubber gloves so as to not have to wait as long anymore.But just put the bag in the freezer for 5 minutes it cools right off.


Squeeze the dickens out of it.


 These last few pictures are for you to see what you get for your time. I will usually squeeze the pectin right into the pot of cooking jam. So moving on I need to say this is something that some will love to do and others will just pick up a box of pectin. I go either way.


Remember that doing things from "Scratch" is always time consuming and needs to be time tested to get the job done the way you like it. DIY can always be improved on and comments are always a great way to learn. I have had people comment and correct me plenty of times Thank Gosh they do!


This is the squeezed to death bag of stuff


And here is the cup of natural pectin I got out of it. I usually like I said squeeze right into the jam and bring it back up to the gel point. If at first you do not succeed try try again.
I do all the time. Oh yes you can. Here is a good site on how to do this process with apples. Here is a site that makes large batch citrus pectin and last but not least here is an old school 1930's article turned modern for you information from Florida.

12.13.2012

Home Made Laundry Detergent

Ok this turned out to be some project. Once it is accomplished it is well worth it. Do not think that any thing we do to become more green it so easy. It takes work and determination. I did a lot of studying prior to taking on this task and still have to use the soap to make sure it is good with our system, skin and life style.

Here are some of the things I found to be important prior to making this concoction is please be
careful of the fumes. Just because it is natural does not mean it is not dangerous. I wore a surgical mask over my mouth and nose because when I made my first batch of home made washing soda the dust and fumes when pouring from the pan to the container did get to me.

When I made my first batch and let it cool it was gel just like they told me but it had a layer of what looked like bar soap on the top. I had to re-heat it and add additional water to get it to the consistency it needed to be. And it still comes out a bit solid. Progress not perfection!

I did my research on a few different sites. Here they are with the comments that I feel need to be added. One site I did really enjoy was on About.com this site was where I learned how to make my own

 Washing Soda out of baking soda I really liked that idea and it worked. There recipe differed from the next one by a half of a cup on the powder ingredients and this seemed to pose a problem in this small yet curious head of mine. The next site I went to was talking about powder detergent but it was the same recipe but not cooked. I kept thinking that pieces of the soap would get stuck and be left on the clothes.          So cook it I say!

Three thing you need to make the soap

1 bar of Fels-Naptha  or Zote  soap
(I used the Zote the research was great)
1 cup of Washing Soda
1 cup of Borax
1 gallon plus one quart of water

To wash clothes use a half of a cup per load


Zote Soap
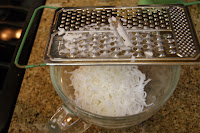
Grating the Zote

Alright the day came ...dun dun dun...It was time to make the Detergent. I was so excited. I took my bowl and grater and sat on the couch and grated the whole bar of Zote soap. It smells so fresh. I felt a closeness to my higher power!


Alright next I went to cook the Zoat in the quart of water. This took a long time. I took me a bout 30 minutes of slow stirring.


Next I stirred in my gallon of water, washing soda and my Borax. Call me woosie but the fumes made me cough! Ok I let this simmer for another 20 minutes stirring to make sure it all dissolved. Right now I took it and poured it into a glass container.


I poured it through a strainer to make sure all the pieces were melted and if they were not they would not get in. Ok I cover it and let it sit.

12.03.2012

Baking Soda to Washing Soda POOF

 Look I am the first person to try to get a little more Ah La Natural but when it becomes a pain in the ass or the stuff does not work I do not like that. Would you? I have made my own fabreze which is delicious and I swear by it. I have made Laundry softener and it works and you have a choice with that you can also use a cup of vinegar per load to soften. Wala.

Ok back to the topic making Washing Soda I followed the directions to the T . I even did the comparison picture. I still need to make detergent and test the detergent to make sure it works. I am a stickler on my laundry. The biggest difference in these two product's  baking VS washing soda is the texture. The Baking soda is clumpy and the Washing soda once baked is fine grain.   Once the baking soda is cooked it will be a tiny bit changed in color. The most noticeable change is the texture.

 There were three different sites I went to to gather as much information as I could one site explains that it is ok to cook the Baking Soda for up to an hour or more. The other two sites make it clear that you had to only cook it for 45 +. At Pennilessparenting this blog gives simple and easy instructions. I should probably stop there but my mind wants all the facts.

Homemade Washing Soda

One box of baking soda standard size is 16 oz or 1 lb
Large baking sheet this would be your cookie sheet
* make sure it has a rim
Strainer
Large Bowl
Zip Lock Bag

Pre heat your oven to 400 degrees.

Spread the baking soda evenly on your baking sheet. Place your baking sheet in the oven and bake for 30 minutes at that time take the tray out and carefully turn the baking soda so that it cooks evenly. Return to over and bake for another 30 minutes. I do it for an hour why? This let's me know that it has cooked thoroughly hand at the right temperature.


Once the baking soda is cooked it will be a tiny bit changed in color. The most noticeable change is the texture. The Soda is smooth and the lumps are all but gone. I take it out of the oven and let it cool down a bit.


Once cooled I send it through a strainer.


 I want no lumps. The lumps that are there are so tiny you would probably not even know they are there. Put your Washing soda into a air tight jar or a zip lock bag. If it is exposed to air it turns back into baking Soda magic!


This next week I will be experimenting with Laundry Soap and other winter fun stuff in the DIY part of the year.