Showing posts with label beans. Show all posts

7.23.2013

Standard Baked Beans

You all know I was on a bean mission and this is the last recipe for now. Once I get an idea in the ole' head I'm obsessed for a few weeks. It is an blessed problem at times.

Here is our last recipe for Summer 
BBQ Baked Beans.


Always wash, rinse and soak your beans overnight.
Some canner's do not or give you a choice.
But go read the reason and fart less !

Place any extra ingredients into the bottom of the jar's prior to filling with beans or liquid.

Ingredients


Makes 7 Quarts or  9 pints

5 pounds of dried beans cleaned and soaked

The site I used for this sauce is my go to site Pick Your Own it gave me two choices a tomato base or molasses base. The link is at the bottom of this post.

Sauce options 

Tomato Base 

1 cup ketchup with 3 cups of broth from cooking beans
3 tablespoons of brown sugar
2 teaspoons kosher salt
1 tablespoon chopped onion
also if you want you can add

1/4 teaspoon of each:
ground cloves
allspice
mace
cayenne pepper
 
OR

Molasses Base

4 cups cooking liquid from beans
3 tablespoons of molasses
1 teaspoon vinegar
2 teaspoon kosher salt
1 teaspoon dry mustard


Take 8 cups of your soaking beans and put them into a large stock pot and simmer until you get a foam on top. I skim the foam like jam also take out any floating beans or shells.  Also look for icky ones and remove them. Once the beans have been simmered turn for 30 minutes turn off the heat and set them aside.


Prepare your liquid you may end up with extra but you should not come up short. Combine all your liquid ingredients and bring them up to a soft boil. Taste it after about 10 minutes of simmering to make sure you have the taste you like. You can add more of any ingredient but keep in mind you cannot take ingredients out once added.  You want just keep the liquid even so you have enough to fill the jars.


Fill you clean warm jars with less than 3/4 of the beans because you will top each jar off with sauce. Make sure the ingredients fill the jar to 3/4 full you will need the extra room during the pressure cooking process. If you fill more than it will not seal. Fill the jars to one inch from the rim with the liquid. Wipe the rim of the jar with a clean cloth. Now put your two piece top and screw band on and place carefully into you pressure canner. Seal and go!


Bring the Pressure canner to a steady steam flow for 10 minutes it clears the air out of the canner. Once 10 minutes has passed pop on the pressure cap and pressure for 75 minutes at 11 to 13 pounds of pressure for quart and 65 minutes with same pressure for pints.  Once the time has passed let your canner cool until the presume is down to ZERO and the steam cap has fallen. Turn and take your top off tipped away from you and let the jars sit in the cooker for about 15 minutes then remove and place on a heat safe counter and let them cool for 24 hours. Once cooled room let the twist part of the top wipe clean and store in a cool place for up to 9 months. .


Disclaimer: This is not an all inclusive recipe for making jam. You should have a basic knowledge and understanding of the canning process before proceeding. Please consult your local
Center for Home Preservation for additional information and available classes.

7.19.2013

BBQ Baked Beans


Now who does not love baked beans. The best thing I like is the fact that I am getting closer and closer to being non-processed food-ish.

I have spent the last three day's doing Beans, Bush Beans, Black Beans, BBQ Beans, Spicy Beans, Yup, beany weenie girl.

Hey did you know that fresh beans you make yourself are less gassy. Yes in plain English you will fart less.  Really it is a proven fact!

But that is another bean post  But this is a great post it tells you how to clean and prep your beans.


BBQ Beans

Makes 7 quarts

Ingredients

5 pounds of dried beans cleaned and soaked
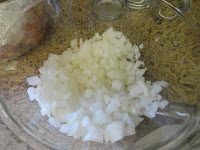
One finely chopped onion
2 cups of cooked and pan fried chopped ham


Liquid

4 cups of liquid from beans cooking

½ cup brown sugar  or a ¼ cup dark molasses
¼ cup apple cider vinegar
¼ cup of liquid smoke
1 tablespoon of Worcestershire sauce
1 teaspoon garlic powder
1 cup ketchup
1 teaspoon kosher salt
1 teaspoon ground fresh pepper
1 tablespoon dry mustard


Take 8 cups of your soaking beans and put them into a large stock pot covered in fresh water and simmer until you get a foam on top. I skim the foam like when you are making jam. Also take out any floating beans or shells.  Also look for icky ones and remove them. Once the beans have been simmered turn off the heat , drain the beans and set them aside.

Prepare your liquid you may end up with extra but you should not come up short. Combine all your liquid ingredients and bring them up to a soft boil. Taste it after about 10 minutes of simmering to make sure you have the taste you like. You can add more of any ingredient but keep in mind you cannot take ingredients out once added.  You want just keep the liquid even so you have enough to fill the jars.

Have your chopped onion and ham in a small bowl ready to add to the jars. I add these to the top of the  jars once I have added the beans prior to adding the liquid. Do not worry it is raw onion and cooked ham the onion will soften and add flavor in the pressure canner.

Fill you clean warm jars with less than 3/4 of the beans because you will top each jar off with a bit of onion and ham. Make sure the ingredients fill the jar to 3/4 full you will need the extra room during the pressure cooking process. If you fill more than it will not seal. All the ingredients will expand during the pressure canning process. Fill the jars to a littel more than one inch from the rim with the liquid. Wipe the rim of the jar with a clean cloth. Now put your two piece top and screw band on and place carefully into you pressure canner. Seal and go!


Bring the Pressure canner to a steady steam flow for 10 minutes it clears the air out of the canner. Once 10 minutes has passed pop on the pressure cap and pressure for 75 minutes at 11 to 13 pounds of pressure for quarts and 65 minutes same pressure for pints.  Once the time has passed let your canner cool until the pressure is down to ZERO and the steam cap has fallen. Turn and take your top off tipped away from you and let the jars sit in the cooker for about 15 minutes then remove and place on a heat safe counter and let them cool for 24 hours.


Once cooled room remove the twist part of the top wipe clean and store in a cool place for up to 9 months.

Why do you store them with the twist off? Here is the twist post 


 Disclaimer: This is not an all inclusive recipe for making BBQ beans. You should have a basic knowledge and understanding of the canning process before proceeding. Please consult your local Center for Home Preservation 

1.04.2013

Pressure Canning Black Beans

Black Beans being Pressure cooked you would think "Relatively Easy!" Sometimes I think there is way to much information on the Internet how do you say "To many Chief's and not enough Indians"  But then again who is the dummy after all I am searching right!


So I set out to pressure cook some black beans. About three months ago I got all excited when I saw a post on FB about someone who was just putting a cup of dry beans in a jar adding water and wala beans! Now I know that yes you can do this but there is just a teenie weenie bit more to it. So being the A-D-D-ish person I went on yes a Google fest. I looked up Pressure Canning Dry Beans.


A month later no shit a month I went to Sprout's one of local good market. Yes, there are good market and there are bad markets. Kinda like the Wizard of OZ. I bought myself 6 pounds of black beans because I was going to pressure can them suckers !

So I soaked my beans and had three sites that I was going back and forth to get the idea's and general rules of the beany thing. I had this site good site but I hate hate hate having to scroll through advertising and pop ups to get to what I need. Also, it got to the point where it showed me exactly how much beans go in the jar and the space I needed to leave and then it said " I still have not gone back and filled with liquids"  Ok that is ok but when you say one inch to the top please please please clarify liquid - beans - both. So I ran over to the other site again has the ad's and the only problem is I think her process is good but Not to soak your beans EEUU ! BEANS ARE DIRTY .


I did tons of research on what beans are grown in and what they have on them besides dirt, sand and other ground grub. Rinsing is essential I would be mortified if some one bit into my beans and got a bit of dirt or that delicious sandy taste. So that site is for me a great one for information. 


Beef Broth simmers with onions and garlic


This is my broth simmering with chopped onions and garlic.

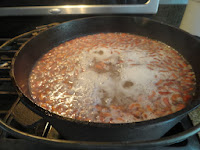
Just below is the beans simmering in the beef broth. After I cleaned the dirty beans. And yes that is a little butter because in one of the sites said "If you add some butter that makes less foam when pressure canning" but again to the jar or to the pan????  I just put some in the simmering broth. no harm done. BUT Next time I am not adding any butter! Waste of good butter!

Here are my jars filled with what I later think was to many beans. I will add less beans next time and more broth !

Black Beans with Garlic

Bean Level


Beans with 1/2 tsp salt you do not need to add salt !!


I added 1 garlic clove and two dried los arboles chiles later I will blend this into a spicy bean dip. Oh Yum!


I searched and search and searched and finally came to the site that had a detailed description of what and how and why for me. It reassured me that time and care and headache I got was worth it because as long as I did not lose more that half the liquid per jar I am ok! Thank you phew Ok here is the information on Ready


This was beans with 1" head space with liquid so I say less beans more liquid


See the pictures of the liquid before I pressure canned and the end result they say as long as there is not less than half full of liquid it is safe. So I am calling this safe!  BUT I will add more liquid less beans next time.


  • Take 5 to 8 pounds of uncooked dry black beans (Or as many as you want to can more or less they almost double in size after soaking example is a half bowl of soaking beans is a almost a whole bowl after they soak)
  • Rinse and then soak the beans overnight in a large bowl or two if you only have small ones please remember beans are dirty
  • The night before you can your beans get everything ready it makes it easier when you get up all refreshed and sipping hot delicious coffee or tea. I put my clean jars into a clean empty dish washer the night before and when I wake up I run a short load by the time I am ready they are hot and clean-er. If you do not have a dish washer just dip them in a large stock pot of boiling water.
  • You need your pressure canner, clean jars pint or quart , lids and seals, jar gripper, oven mitt's, measuring cups or something to pour the beans into the jars, large pot for your broth and large enough to add your beans, get your things you want to add chopped and in bowls (I do carrot's chopped three cups, garlic cloves two per jar and dried los arboles chilies two per jar, beef (chicken)broth 8 cups +, kosher salt 1/2 tsp per pint 1 tsp per quart this salt is a personal choice not necessary, measuring spoons, towels , clean sponge or small rag to wipe jars. I think that is it? 
  • Good Morning it is the next day did you dream beans? 
  • Rinse and clean your beans - pick out the creepy looking ones and rinse well. I rinse them take a layer at a time and put the beans in the broth. Rinse a layer off at a time until they are all ready to simmer in the pot.
  •  Put your broth 8 + cups is good add water if you need more liquid in your pot and let it simmer on low. The broth should just cover the beans by about 2 inches this gives you plenty of broth for the jars.
  • You can only do 6-7 jars at a time in a standard pressure canner so the jars and half fill them 1/2 fill the jar with beans if you are adding other ingredients. I add raw chopped carrot's then add more beans. I say fill them till you have a the jar 3/4 full.  Now fill the remaining space with your liquid. . Look at my pictures I should have put a little less beans in my jars and more liquid. Add enough liquid to cover your ingredients and make sure it is a least an inch and a half or so from the top of the jar. Everything will expand more when pressure canned. 
  • Ok once filled wipe the jar rims clean and put on the lid and rim and tighten. Put the jars in your pressure canner. Make sure there is space between each jar they need room to jiggle around a bit. I never have more than 7 well actually I could not fit more than 7 in mine. That was a duh moment.
  • Beans/Carrot/Beans again to much beans and I will fill with more liquid
  •  
  • Pressure can at 10-11 pounds of pressure for 75 minutes for pint and 90 for quart. 
  •  
Hey good luck nothing is set in stone ( dirty beans have stones) my friends. Just make sure you are using clean sterile stuff and wash those hands. Good Luck and Happy Beans. Hey pressure canned beans means less farts ! WOOT WOOT


Disclaimer: This is not an all inclusive recipe for making jam. You should have a basic knowledge and understanding of the canning process before proceeding. Please consult your local Center for Home Preservation for additional information and available classes.

2.10.2012

Pressure Canning Pinto Beans

Pressure Canning Pinto Beans is not so hard. I semi-followed the recipe I grabbed on two different sites.

First the measuring you want to measure your beans dry. Most recipes will call out by the pound and most bagged dry beans come in bags. 

I did:

3 lbs of beans to get you 8 pint jars 

Or you can do :

5 lbs of beans for 7 quarts


I have started to do all my beans in quart because we always want more. 


Rinsed beans

 Put dried beans in a large mixing bowl add water to cover beans by 2 inches. Rinse them until the water runs clean. Remove any debris or floating beans. Take your beans and put them into a large pot and boil for 2 minutes. Remove them from the heat and allow your beans to soak overnight. Adding water when needed. You are re-hydrating your beans.


The beans have plumped up now, discard the water they have been sitting in. Put the beans into a large pot and cover them with liquid plain water or a broth is fine. Keep them on simmer for at least 30 minutes, stirring frequently. (Hard boil tends to split beans.)


Fill your jars with the beans to 3/4 full then add the liquid the beans simmered in to leave one inch of head-space.  You can add 1/4 teaspoon of salt per pint and a teaspoon per quart. This is an option not mandatory. I do not add salt. But what I do do depending on the beans is on the final simmer I add equal parts water with chicken or beef broth I have made. It gives the beans great taste. 
You leave the one inch of head space because the beans have a tendency to grow even more! Little devils. 


Your water in the pressure canner should be hot and at least 3 inch's deep.Using your tongs carefully place your jar's into the pressure canner.  Bring the pressure canner to a steady steam flow for 10 minutes it clears the air out of the canner.
Once 10 minutes has passed pop on the pressure cap and pressure for 75 minutes at 11 to 13 pounds of pressure for pint jars and 90 minutes for quarts. 


Once the time has passed let your canner cool until the presume is down to ZERO and the steam cap has fallen. Remove the steam cap and then carefully turn and take your top off tipped away from you. Let the jars sit in the cooker for about 15 minutes then remove and place on a heat safe counter and let them cool for 24 hours. Once cooled room let the twist part of the top wipe clean and store in a cool place for up to 9 months. 


I added some of my dried jalapenos to half the jars yummmm


Optional add-on:

Garlic, onions, jalapenos or red crushed peppers the kind you use on pizza. I used a vegetable broth that I had in the freezer to give them a little more taste. Get creative please. Enjoy 


The sites I went to to research the recipes are Pick your own my "go to site" and SB Canning. I think Pick your own was just a bit more detailed. 

Disclaimer: This is not an all inclusive recipe for making jam. You should have a basic knowledge and understanding of the canning process before proceeding. Please consult your local Center for Home Preservation for additional information and available classes.