Showing posts with label vanilla. Show all posts

11.18.2020

Making Your Own Vanilla Powder

Vanilla Beans one of the seasoning and flavor enhancers that I think people have no idea how far you can take these little beans. I will post at the end of this the links for various ways I use these heavenly beans. 


First let us start with a few things you need to do for Vanilla Powder. Let me tell you to use your beans for other things before you use them just for Vanilla Powder. They are potent little ones and can be used multiple times for various projects. I start once I order my beans planning their uses first I make some Pure Vanilla Extract. Once that is done I take the beans out of the extract. There is plenty of flavor left in the beans alone. Even when I make three batches out of my beans. 


I have to start this post on the How to remove the beans from the extract. I never order and use them  fresh to make the vanilla powder this is such a terrible waste of good beans. 

Alrighty enough let's start by removing the beans from the Vanilla Extract. This can be tricky but once you have emptied your vessel of the vanilla extract you made it is a lot easier. I use a narrow fork to grab them by the curl. They all naturally have a nice curl on one end of the bean. Pull the beans from the vessel and place them on a plate.


Once you have removed your beans it is time to cut the end off and slice them down the middle if you did not already do this for your Vanilla Extract. You can use a cookie baking sheet covered with parchment paper to dry the beans. This way they have an area to dry that you can move them around and lose nothing from the beans. Dry the beans on a counter in the house you could also start the process by using your oven set at 170 for a few hours. 


Now that your beans are dried it is time to make the powder. 

I start by chopping the beans as small as possible. I use a Mortar and Pestle to do my beginning grinding. Once they have been crushed you can take them and put them into a spice grinder. I use a coffee bean grinder that is my makeshift spice grinder. It works and it is only for spices to be ground. 


Once the vanilla has been ground I put it through a strainer to keep the larger vanilla beans out and separate. I can use these for other cooking needs. They will work if you make a spice package to use in jam or sauces. Also for Vanilla Sugar.


Once you are done separating the vanilla beans and powder put your powder into a glass container and keep in a cool dry cupboard. Use this power for all your baking needs it comes in extra handy during the Holidays as you do so much baking during winter months. If you make ice cream this powder is what it needs. 


Also you can make Vanilla Extract. Another great way to use the beans is Vanilla Sugar

Here are a few Jam Recipes using Vanilla

11.15.2020

Strawberry Vanilla Shrub


Shrub, shrub and more shrubs. This one is wonderful and I was able to use my leftover vanilla beans for this shrub syrup. Plus, I took the center of the pod for all the gooey juicy goodness. As I have said before strawberries are abundant here in Ventura County they grow year around.The directions are easy like all the shrubs so let us get started. 


Ingredients

  • 1.5 pounds of ripe strawberries chopped
  • 1.25 cups of trabino sugar
  • 1 or 2 left over vanilla pods or 2 teaspoons of vanilla extract
  • 1.25 cups of quality apple cider vinegar


Place the strawberries into a large glass dish.Add your vanilla pods chopped or the extract.


Sprinkle the sugar on the top of and then mix it well. Seal with a lid or plastic covering for two days in the refrigerator. Stirring daily. This will allow the fruit juices to be drawn out by the sugar.


After two days in the refrigerator take the bowl out of the refrigerator stir the ingredients and make sure there is no undissolved sugar. Next you will want to have a strainer or some cheese cloth on hand so you can strain the liquid. I use cheese cloth because I like to squeeze the dickens out of the fruit once strained. 


Once you have completely strained the liquid add the apple cider vinegar.Stir and restrain the syrup into a clean glass jar. You an use your shrub immediately it will have a true vinegar tang. But if you leave it for a few days it gets a the flavors begin to balance together. Shake it everyday and after about one week the balance between sweet and sour is great. 


You can use your shrub with water soda or regular. Also use your shrub with different mixes of non-alcohol and spiked drinks as well. The ratio is 1:2 but can be adjusted to your specific taste.
It is good refrigerated for about 3 weeks. 

8.16.2018

Cherry Preserves with Vanilla


This is the first year for Preserves I have always taken the delicious cherries I get from Washington and produced some great Jam's. Last year we made a Cherry Mint Shrub . I do always try to get super creative but this year we are going to enjoy the simplicity of the cherry itself.


Cherry Preserves with Brown Sugar and Vanilla

Make approximately 8 half pint jars

8 pounds of clean pitted cherries - chopped makes about 8/10 cups
1/4 cup fresh squeeze lemon juice
1 cup brown sugar
3 Vanilla Pod's and 1 tablespoon of  *Vanilla Powder 

I took this recipe and complete changed it up by adding so little sugar as well as making it brown sugar which gives it such a warm flavor. To start have all your tools and water bath ready. I leave the jars in the hot water to have ready to jar up and give the water bath.


Clean and pit and chop your cherries. Yes it is a chore to get all the pits and the nice thing is that any left over pits float in the jam or preserve making it easy to fish the seeds out. Once your cherries are pitted and clean put them into your pot. Add the lemon and stir on low until the cherries are easy to smash a little. This releases the juices/natural pectin and will let the cherries accept the rest of the ingredients.  


While the cherries are warming take your vanilla beans and slice them down the middle and scrape the vanilla out of them and add the goo as well as the vanilla pod to the cherries mixture.


* Let's talk Vanilla Powder.I make Vanilla Extract and after many a batch I have left over beans from the liquid. these are not to be wasted they are infused with so much flavor. I simply dry them out and grind them for Jam's and they work fabulous for Baking and Ice Cream. 


Your pot should simmer for about a half hour this lets the flavors mingle. Now add the brown sugar to the mixture the mixture should have a nice texture not to thin and not to thick. Let this simmer for 5 to 6 minutes.


Have your jars ready. Turn off the heat under the cherries. Let this sit for 5 minutes. I always let my jam sit for a few minutes once it is ready to go into the jars. Many reasons trust me it helps. Skim off any foam. Take out those vanilla pods you put in earlier !


Take your jars our and fill them to 1/2 " head space. Wipe the rim of the jar clean and cap. Water bath for 10 minutes remove let them cool for at least 12 hours. Remove the twist clean the jar label and store in a cool dry area. Good for 1 year give or take.


Disclaimer: This is not an all inclusive recipe for making jam. You should have a basic knowledge and understanding of the canning process before proceeding. Please consult your local Agricultural Extension Service for additional information. 

8.10.2016

Madagascar Vanilla Peach Jam

Peach Jam of any sort is delicious. This Vanilla Peach Jam has a incredible blast of Vanilla Extract and Pure Vanilla Pods dried and ground.

This is not only a Peach Jam Lover's delight it will stir the palate of all Vanilla Lovers.

We need to give thanks to Sweet Preservation and the Washington Fruit Commission for sending these big beautiful Peaches grow and hand picked in the beautiful state of Washington.


6.13.2015

Cherry Jam with Fresh Vanilla


Cherry Jam what a treat. Cherry Jam with Vanilla added well a Cherry Bonus. I was honored to be asked to be a part of the Cabassador Program that the Washington State Fruit Commission runs through The Art of Loving Fruit at Sweet Preservation. Many have gone before me and I can only hope my Cherry Jam holds up to the standards.


This little project took a lot of research and time. I wanted to make sure that we had some recipes that the Internet has not flooded yet. The first Cherry Jam recipe I did was a Cherry Jam with Vanilla.


Vanilla is my friend. I currently make my own Vanilla Extract and always have ground up pods from the extract. The pods  have a great flavor along with the inners of a fresh vanilla pod just took this jam to the next level. The cherries that I received from Washington had to be the sweetest juiciest cherries this preserver has ever had. I was able to cut the sugar in this jam and those little dark delights held their own. 


Well here are your ingredients and please make sure everything is ready prior to your preserving. This will make you approximately 6 half pint jars of jam.

Ingredients


3 pounds cherries
1 lemon (juice and zest)
2 fresh vanilla pod's
1 tbsp of vanilla powder (optional)
4 cups of sugar

Pre work is simple.

Clean, pit and cut your cherries in half. Now rinse them again. Chop your cherries to the consistency you like. We all know I love thick jam. When you are cooking them the skin will dissipate a bit. Watch for pit's. They do not float like citrus seeds.

Zest the lemon and add the zest into a separate small container. Cut your lemon and squeeze the dickens out of it. Add this to your container. Watch for seeds.

Split and scrap your vanilla beans keep the pods you will add them to the jam once it is cooking.


Start you batch by putting your clean chopped cherries into a non-reactive pot and turn the flame on to medium.


Smash your cherries while they are cooking the juice is thick and dark. There are a few ways of doing this. You can mush or use an immersion blender while they are cooking. They do thin out while cooking no matter how you cut them.

Look at that beautiful juice in the pot. While the cherries are cooking down add your lemon mixture. Keep stirring.


Now you can add your vanilla ingredients. I added the pod along with my vanilla scrapping. You split the pod down the middle and scrape the goo out. 
I add the ground vanilla. I make my own vanilla extract and grind the pod after it has been made. 
Stir this in and let it simmer.
My jam will simmer for about an hour. Stirring often through out this process.


I do not use pectin in most of my jam's. After the simmer time I bring my jam up to a rolling boiling this process will gel my jam with no pectin. My grandma taught me this.  

You can use box pectin use this recipe with the pectin box directions. You will have to use a lot more sugar.


Alright by now you have your lemon and vanilla added and have your jam going at a nice simmer. Time to add your sugar. Bring the jam mixture up to a rolling boil and add your sugar one cup at a time. Between cup's stir and let the sugar dissolve prior to adding another cup. Do this until all the sugar is added and then bring it back up to a rolling boil.


Gel times differ if you use no pectin or pectin. No pectin needs to be brought up to a boiling point of 223 degrees. Pectin is to the boiling point. Here is a pectin not pectin link to help you if needed.


Now it is time to scrap the foam off and get to jarrin' up. Turn off the burner and let your jam sit for 5 minutes this helps the fruit not to float in your jam once canned. Ok scrap off the foam and have your jars ready.  Ladle into 1/2 pint jelly jars till 1/2" from the top of the jar. Wipe your jars clean and cap and water bath them for 12 minutes.


Take the jams out of the water bath and let them cool overnight. Once cooled take the ring off wash and store in a cool spot. Your jam's will be good for 6 to 9 months. Once open put them in the refrigerator and enjoy.

Disclaimer: This is not an all inclusive recipe for making jam. You should have a basic knowledge and understanding of the canning process before proceeding. Please consult your local Center for Home Preservation for additional information and available classes.

9.26.2012

Vanilla Sugar

 What is vanilla sugar?

Vanilla sugar is mostly a homemade item.

Vanilla sugar is a term used by cooks for sugar that is flavored with a vanilla bean.

You can make vanilla sugar at home very easily by splitting a vanilla bean, scraping out the seeds -- use them in a recipe -- and burying the split vanilla bean into a container of sugar.

Cover tightly, and, after about a week, the vanilla bean will have flavored the sugar with a delicious vanilla scent and taste that will improve everything from a coffee cake or cookie topping to a cup of hot cocoa.

Vanilla sugar is also good as a substitute for regular sugar in scones, quick breads, or almost anything that would benefit from a vanilla undertone.

  • 4 cups sugar
  • 3 to 4 vanilla beans


When I made my batch of Vanilla Sugar I noted that the vanilla beans if fresh are quite moist. I used a sharp paring knife, halved vanilla beans lengthwise. Scrape vanilla seeds from the pod onto a cutting board using the side of the knife. Then I put a small pile of sugar on to my cutting board and using my finger tips or a fork, I evenly distribute the seeds as best I could through layer of sugar filling my jar about 2 cups at a time. I have a few big container as I am going to use this for holiday gifts.
Place sugar in a medium bowl.  Cover and store in an airtight container up to 3 months.

If you have a container for your own pantry just refill the jar with sugar as you use it. I use some of the the beans I have had in the Vanilla Extract I make each year for gifts.

Another way to use the Vanilla Pod's and get a pretty jar for a tea or daily use is get a box of sugar cubes and put them in a jar add the pods this will give the flavor and aroma of the vanilla while giving a nice detail any party table.  

9.19.2012

What about the Pod's..Holiday Gifts!

These are all from my batch of vanilla extract.
Well as most of you know I make Vanilla Extract Recipe as gifts for the Holiday's. 
Well I am getting the bottles started and wondered hey what can I do with these left over pods. I add two pods to each jar that I fill but there are at least 15 or so left over from the original batch of  Vanilla Extract. The bag of vanilla I bought for the vanilla extract recipe
said that I should store them in sugar granulated or powder. I thought I would put small batches through the food saver in little vacuum bags. The rest I am going to buy small jars and make vanilla sugar for gifts.

Other ideas for using Vanilla Beans

- Infuse Vanilla Beans in sea salt to create naturally scented bath salts or for culinary use. 


- Place a Vanilla Bean in a jar filled with sugar, it tastes delicious in coffee or sprinkled over Creme Brulee.

- Add Vanilla Beans to liquors. They are especially wonderful in whiskey, bourbon, or vodka.

- Gently heat honey with a Vanilla Bean in it to create Vanilla infused honey. Simple and delectable for dipping fresh fruit or drizzling over desserts.
9.10.2012

Lemon Marmalade


I love Marmalade well let's get honest I love love love Lemons. Any way I can incorporate them into a preserve and get that tart taste well.... Yes!

I tried something new I put a couple of vanilla pods into the brew while cooking down the marmalade. It turned out scrumptious.


Ingredients

4 cups lemon pulp (Meyer is best)
2 lemons sliced thin about a cup
1 cup thinly sliced lemon peel (rinds)(just peel)
¼ tsp baking soda
2 cup of lemon juice (fresh squeezed its best but bottled will do)
2 cups of water 
2 vanilla pods sliced down the middle
3 to 4 cups of sugar again to taste I like 3 but I like tart
*******gel point of 223 degreez


So thinly slice your 2 lemons skin,rinds and all. It comes to about a cup or so give or take. Now take the slices and cut them into quarters. Put the slices in 1 cup of the water and 1 cup of the lemon juice add the baking soda and put it in the pot bring it to a boil . Now turn  it down and let it simmer on low for oh 20 minutes this tenderizes the lemon. Do not worry the baking soda does no affect the taste of the end product.


In the meantime cube up your lemons and this is without the peel cut enough to have 4 cups. Also cut your cup of lemon peels. Use the peels from the citrus you are sectioning right now. This is time consuming but you need the variety of pulp, peels and sections to make a truly good marmalade. 


Here is a link on how to separate the citrus for easy cutting.  but like all my tips you make it the consistency you like after all its your jam. 


Add the cooked peel from earlier (add the whole pot liquid included), 1 cup of water, 1 cup of lemon juice, the peels from the cubed citrus and the 4 cups of fruit  Bring to a boil over medium-high heat. Reduce the heat and boil gently for about a half hour stirring occasionally. 


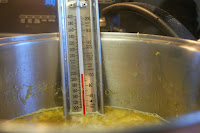
In the same pot, continue with  fruit mixture at the medium-high heat. Add in the vanilla bean and 4 cups of sugar (one at a time mixing it in completely) gradually, maintaining the boil. A boil you can not stir down. Stirring constantly, until the mixture reaches the gel stage. This is a temperature of 223 degrees. 


Let the marmalade cool for a few minutes. It should get a top like when coco cools and it gets that thin cover. This is another way you can see it has a set.

Then, skim off the foam if any and ladle the hot marmalade into the warm jars, leaving 1/4" headspace. Process 10 minutes and then remove the canner lid. Wait 5 minutes longer before removing the jars. Let the marmalade cool for at least 8 hours then remove the twist portion of the lid and wash your jars. Store your jars without the twist in a cool dry cupboard. Makes four 8-ounce jars.

Disclaimer: This is not an all inclusive recipe for making jam. You should have a basic knowledge and understanding of the canning process before proceeding. Please consult your local Center for Home Preservation for additional information and available classes.

8.23.2012

Strawberry Jam with Pure Vanilla

So as most of you know I have make Vanilla Extract . The Vanilla Pods came from a site called Saffron. Strawberries are available year around in Ventura County. They are ripe and they need to be cooked, chopped, canned or eaten with in the day you purchase them. Having so many right now I wanted to get a little creative. 


I searched the Internet and found a few strawberry jam recipes with vanilla added. Well in my opinion to add vanilla is not imitation vanilla extract. Good if you have no other resources for Pure Vanilla Pods or Extract.


I took three vanilla pods from the jug of Vanilla Extract. I only had to run my knife along the pods and the vanilla oozed out. It looked like motor oil. It was fabulous! I then took the vanilla pods and I squeezed the nummy out and chopped them into about one inch strips. I wanted to have at least one piece for each jar. I am looking at this batch making about 8 half pints. I have a variety of half pint jars all different shapes. How fun!


Ingredients

6 cups/ 2 pounds strawberries
1/4 cup fresh lemon juice
2 cups sugar
3 vanilla bean, split lengthwise with the inner scraped out
*Then cut your vanilla beans into one inch pieces to place in your jars.
this is going to make this jam crazy vanilla delicious


Combine all ingredients in a large pot. Smash the berries to break them up I use a potato masher. Bring the mixture to a boil over medium high heat, stirring frequently.


Reduce heat and simmer mixture until thickened, about 1 hour. 
Test your jam to make sure it is set/gel. There are several ways to do this follow the link for more information. Once your jam has gotten to the set point turn off the heat and let it cool for a few minutes. Skim off the foam and jar up your jam into the warm jars. Leave a 1/2" head space. Wipe the rims of the jar and pop the lids on cap with a clean twist ring
Make sure you use sterilized jars and boil filled jars in your water bath for 12 minutes.


Once the jam has been on the water bath for 12 minutes turn off the heat. Let the jam sit for a few minutes the water is HOT. Remove the jars place them on a clean cloth on the counter and let them cool completely. Now remove the twist top wash the jars, label them and store in a cool dry place. Do not store your jars with the twist top on. 


Disclaimer: This is not an all inclusive recipe for making jam. You should have a basic knowledge and understanding of the canning process before proceeding. Please consult your local Center for Home Preservation for additional information and available classes.