Showing posts with label cherries. Show all posts

8.16.2018

Cherry Preserves with Vanilla


This is the first year for Preserves I have always taken the delicious cherries I get from Washington and produced some great Jam's. Last year we made a Cherry Mint Shrub . I do always try to get super creative but this year we are going to enjoy the simplicity of the cherry itself.


Cherry Preserves with Brown Sugar and Vanilla

Make approximately 8 half pint jars

8 pounds of clean pitted cherries - chopped makes about 8/10 cups
1/4 cup fresh squeeze lemon juice
1 cup brown sugar
3 Vanilla Pod's and 1 tablespoon of  *Vanilla Powder 

I took this recipe and complete changed it up by adding so little sugar as well as making it brown sugar which gives it such a warm flavor. To start have all your tools and water bath ready. I leave the jars in the hot water to have ready to jar up and give the water bath.


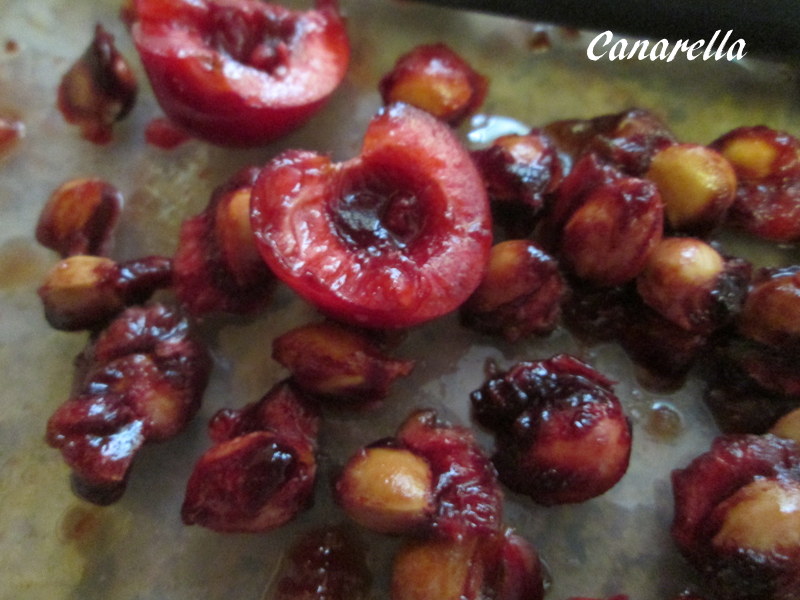
Clean and pit and chop your cherries. Yes it is a chore to get all the pits and the nice thing is that any left over pits float in the jam or preserve making it easy to fish the seeds out. Once your cherries are pitted and clean put them into your pot. Add the lemon and stir on low until the cherries are easy to smash a little. This releases the juices/natural pectin and will let the cherries accept the rest of the ingredients.  


While the cherries are warming take your vanilla beans and slice them down the middle and scrape the vanilla out of them and add the goo as well as the vanilla pod to the cherries mixture.


* Let's talk Vanilla Powder.I make Vanilla Extract and after many a batch I have left over beans from the liquid. these are not to be wasted they are infused with so much flavor. I simply dry them out and grind them for Jam's and they work fabulous for Baking and Ice Cream. 


Your pot should simmer for about a half hour this lets the flavors mingle. Now add the brown sugar to the mixture the mixture should have a nice texture not to thin and not to thick. Let this simmer for 5 to 6 minutes.


Have your jars ready. Turn off the heat under the cherries. Let this sit for 5 minutes. I always let my jam sit for a few minutes once it is ready to go into the jars. Many reasons trust me it helps. Skim off any foam. Take out those vanilla pods you put in earlier !


Take your jars our and fill them to 1/2 " head space. Wipe the rim of the jar clean and cap. Water bath for 10 minutes remove let them cool for at least 12 hours. Remove the twist clean the jar label and store in a cool dry area. Good for 1 year give or take.


Disclaimer: This is not an all inclusive recipe for making jam. You should have a basic knowledge and understanding of the canning process before proceeding. Please consult your local Agricultural Extension Service for additional information. 

8.31.2017

Italian Plum and Cherry Jam


A Washington Fruit you mean so much to me! Every year as you all know I am blessed with the gift of stone fruit from Washington. At the beginning of the season I got a load of killer delicious cherries. With that I made some great Jam's. But my little caning mind said

"Hey Canarella freeze some of these Cherries for later in the season when more stone fruit arrives and mix up a Stone Fruit Party!

Washington State Fruit Commission I love them !


And in come the Italian Prunes but for reason's we all know we can changing the name to Italian Plum's because they are not yet shriveled! Thus we have the Washington Stone Fruit Late Season Party other's will know as Italian Plum and Cherry Jam.

Let us head to the Big Copper Kettle and get to Jammin'

Ingredients - Make app 8 half pint jar's

Clean you fruit

6 cups pitted and chopped Italian Plums
4 cups pitted shopped Cherries
1/4 cup lemon juice
2 cups granulated sugar


Put your clean, chopped stone fruit into your pot. Make sure it is non-reactive. I have a beautiful copper kettle my hubby got me a few year's back. That is another post.

Add your lemon juice to your fruit keeping the heat on low to medium you want to slowly cook your fruit to soften it for smashing. The longer you cook it down the more natural juice you will get from the fruit. It is a magical process.


My jam's are non pectin jam's. I have used pectin in the past and many of my recipes call out for it but through the year's I have found more taste, less sugar and a beautifully set gel to most of my jam's.

The trick is heat. Be patient any good jam is not something I want to rush if your in a rush get out of the kitchen. Alright your fruit should be softening up to be able to start crushing. I use a potato smasher and an immersion blender. I start with the potato smasher to because I do not always want to blend the fruit to much. I want you to have a nice piece of fruit to see and taste when eating my jam's.


Here are my two magic tools.


Alright moving on you want to get the consistency of your jam to what you like best. Now it is time to add your sugar and get the jam up to temperature. Add you sugar one cup at a time and keep the flame on high. You want a boil you can not cook down. Your thermometer should get to a temperature of 223 degree's to gel.

Here is a link to the whole Gel Point Topic. This post will lead you to the Make your own Pectin post and the good old Pectin or No Pectin Post!


Well now back to our Jam. Now that you have added all your ingredients and have it up to a good temperature turn off the heat and let it sit for 5 minutes. Now if it is gelled it will get a nice film on top but no worries it will still be hot enough for your jars and you can easily stir in the little film. It looks beautiful!


Have your jar's ready. Cover your counter to protect the jar and the counter. Fill your jar's to 1/2 inch from the top. Wipe the rims. Place the lid and twist top . Twist it taunt and put into the boiling water bath for 10 minutes. Once the time is done let them sit for a few minutes and then remove and place on a covered counter for no less than 24 hours. Once done Remove the Twist and wash your jar's.

Label and Store.

Disclaimer: This is not an all inclusive recipe for making jam. You should have a basic knowledge and understanding of the canning process before proceeding. Please consult your local Agricultural Extension Service for additional information.

7.13.2017

Cherry with Crystallized Ginger Jam

Cherry Ginger Jam I have yet to run out of idea's for the cherries. I received my yearly box from the NW Cherry Growers. Cherry Jam with a nice cup of Crystallized Ginger sounds pretty terrific to me.  The day my box arrives I am so ready. Pa and I sit and anticipate the wonderful Jam's and concoctions we can make from these wonder nuggets. Well I could go on all day but let's get started Jammin'


Ingredients

8 cups of clean, pitted, chopped cherries
1/4 cup fresh lemon juice
2 teaspoons ginger powder
3/4 cup crystallized ginger
2 cups of sugar


Start by putting your cherries and lemon juice in a large non-reactive pot. Stir on a medium heat while smashing your cherries to the consistency you like. I like nice pieces of fruit in my jam's. Keep stirring the cherries keeping the heat at bay so as to not burn or scorch your jam. Never ever ever make jam without having the time and patience to enjoy the process. 


 Now you can add you Ginger Powder one teaspoon at a time making sure it blends into the cherries. Next you can add one cup of the sugar and stir to incorporate well.


This is going to be the time to add the crystallized ginger before you add the last cup of sugar. Stir, stir, stir cha cha cha ! Ok let's add that last cup of sugar and get the jam up to a rolling boil that cab not be stirred down.


You can just see the small little chunks of ginger.


This is going to be Cherrylicious


Now that everything is having a party in our pot we need to get the temperature up to 223. This temperature will bring your jam (most of the time) to a gel point. I put my thermometer into the jam about 10 minutes prior to the water-bath.


How beautiful is this jam. I note that Cherry Jam is one of the deepest colored jam I do. And the flavor is so very rich. Alright it is time to jar up this beauty. Take your warm jar's and full them to a 1/2 inch from the rim of the jar. Wipe the rim of the jars clean and place the top and twist on. Give your jar's a 12 minutes water-bath.


Once they have taken their bath remove the warm jars from the pot and place them on a towel covered counter. Let them cool for 24 hours and then remove the twist clean your jars. Dry your jar and label with type of jam and date you preserved them.. Store them in a cool area.

Disclaimer: This is not an all inclusive recipe for making jam. You should have a basic knowledge and understanding of the canning process before proceeding. Please consult your local Agricultural Extension Service for additional information.

7.09.2017

Cherry Maple Jam

Cherry Maple Jam this is a wonderful Jam. Simple and the flavor of the sweet cherries and pure maple syrup just compliment one another delightfully. I was sitting with Pa and going over some idea's for Cherry jam and we both knew that many people use Bourbon with their Cherry recipes but we did not want to incorporate liquor in the jam.


So we thought brown sugar good idea.  Then BAM Maple Syrup yes indeed what a grand thought. Thus the Maple-licious Jam was born.

This great jam would not be possible without the cherries I was sent from the NW Cherry Growers. 
Every year I am blessed to be a part of the Canbassador Program and delight in sending them new and creative idea's on what to do with their bounty of deliciousness.

Ingredients

Makes app. 6 to 10 half pint jars

8 cups clean, pitted and chopped cherries
1 cup pure maple syrup
1/4 cup fresh lemon juice
1 cup dark brown sugar


Begin by putting you clean pitted cherries into your pot with the lemon juice. Keep these on a low to medium heat while they soften up. Smash as needed to get some juice out of your cherries.  The pits you miss and I always miss pits they do not float so you should be able to feel them while you are creating your jam. Just grab them with a spoon like I have. Look to the left I use a potato masher and this is how I find most of the sneaky pits.


Next add your Maple Syrup and stir together. You want that flavor of the maple syrup to wander through out your cherries. Once this is  incorporated add your brown sugar. Keep this at a good rolling boil.


Once you have everything nicely mixed keep your jam at a rolling boil one you can not stir down. Keep this boil and stirring process going until you have brought your jam up to a temperature of 223. This should make a nice set to your jam.


 Now it is time to put this delicious jam into the jars.


Fill your warm jar to 1/2 inch from the top of the jar. Wipe the rims clean and put on the lid and twist. Place the jars into the water-bath and let them stay at a boil for 15 minutes. Once done remove the hot jars an place on a towel covered counter for 24 hours. Once cooled remove the twist and clean the jars. Label and place in a cool dry area.

Disclaimer: This is not an all inclusive recipe for making jam. You should have a basic knowledge and understanding of the canning process before proceeding. Please consult your local Agricultural Extension Service for additional information.

Cherry Strawberry Jam


Well it is Canbasador time of the year. Each year the Washington Fruit Board and NW Cherry Growers they send me fresh cherries from their wonderful farm's. I am then tasked with making a few new recipes for them and you.  In the past I have gotten pretty creative as to not do the usual. This year I realized that I never used that fruit we are so blessed with fresh off the Oxnard Strawberry Farmlands.


So with that little history let us get started on our Cherry Adventure. A few notes we do not use pectin I go by temperature to bring my jams up to set. But if you choose to use pectin just use the box directions.

Ingredients - Yields app 8 half pint jars

8 cup cleaned pitted cherries
4 cups cleaned chopped strawberries
1/4 cup fresh lemon juice
2 cups granulated sugar


Pit and clean your cherries. You can chop them by hand or food processor. My way of making jam is really letting the cherries do their thing. They will soften and then I will take my potato masher and crush them. I love chunky jams. If you get a nice piece of fruit Yippee!

While the cherries cook on a medium heat clean and chop your strawberries. Before you start that add your lemon juice the cherries may need some liquid. The cherries will begin to break down and with that you will get juice.


Now add you strawberries and half of your sugar. Smash and stir is the name of the game. My process of making jam over the years has evolved as you will notice if you have used this site. I use to do the Wam Bam Make in Jam method. But I have learned the slow process works and my jams are quite delicious.

I sure do know how hard it is when time is so short these days and between work, kids and life itself it can be something of a chore to do anything slowly.


When you have the consistency you like it is time to add the remaining sugar.  I will then cook my jam on a rapid boil I can not stir down until I get my jam up to a temperature of 223 this will almost always get me to the gel stage. You can check in various ways. If you do not want to turn off the jam use the spoon in the freezer method.

I can turn my jam off and let it sit for few minutes and it will almost always get that gel topping that tells me it is ready to jar up.


Once your jam has set you are ready to jar it up. Take your warm jars and pour your warm jam into the jar leaving a 1/2 inch from the rim of the jar.  After you have filled all your jar's wipe the rims clean and put on the top and twist. Put your jar's into a boiling water bath and let them boil for 12 minutes.

Once done remove your jar's and place them on a towel covered counter. Let your jars rest for 24 hours remove the twist, clean your jars, label, and store. Do not store with the twist on.


Disclaimer: This is not an all inclusive recipe for making jam. You should have a basic knowledge and understanding of the canning process before proceeding. Please consult your local Agricultural Extension Service for additional information.

Cherry-Mint Shrub


Cherry Mint Shrub yes this summer as long as I am preserving my jam's I will add a new shrub to the list. I just got my shipment of fresh cherries from the Washington State Fruit Board and NW Cherries. I am so honored and delighted to be a part of their program. A big shout out to them!


Ingredients

2 cups chopped cherries
1/2 cup fresh peppermint leaves
1/2 cup turbinado sugar
1/4 cup apple cinder vinegar
1/4 cup red wine vinegar


Place the cherries, mint and sugar into a medium bowl. Stir to combine. I always give you little tips on the things we make and preserve. I will spend about an hour stirring and combining to make sure I get everything together and dissolved.

My hubby "Pa" cut the end of some old wooden spoons for me and I use them for all thing's. They are so great for the bottom of flat pans to get everything off the bottom that likes to hide.


Cover the bowl with plastic wrap and place in the refrigerator for 1 day. I switched the recipe up a bit. I will take the mixture out of the refrigerator and add the vinegar's the next day.


I will then return it to the refrigerator to sit for an additional day. I think that the longer it gets to sit together the better the combination is going to be. So far this method has worked for me and everyone is still alive! 

 Now you are ready to strain this lovely combo. Remove the cover and stir your ingredients. Place a piece of cheese cloth over your bowl and slowly pour the ingredients over the bowl.

* I secure my cheese cloth with a rubber band and wash your hands

I leave the ingredients to strain for about an hour then slowly remove cheese cloth so as to be able to hold it and squeeze it until all the liquid is in the container.


 Now you should have a beautiful dark liquid to pour into your mason jar. Look you can see me waving in the reflections. So cute I am! Once it is in a container secure the top and return to the refrigerator for one week to sit prior to using it.


 Enjoy this and all our Shrub recipes !


7.09.2016

Cherry Mango Jam

Sweet Cherry Mango Jam.Well here is recipe number 2 on our 2016 Washington State Fruit Commission Cherry Jam.

Last year I was able to make a few more variety. This year I seemed to have a few less than last year. Let me tell you it had nothing at all to do with the fact that the cherries were delicious!

Thank you Sweet Preservation


Ingredients

8 cups cherries - pitted and split in half
4 cups mango - peeled and chopped
1/4 cup lemon juice
3 cups sugar


Begin by cleaning your cherries and pitting them. Next step is to cut your cherries in half. Once they have been cut put all the cherries into your pot to cook. You will need to peel and chop the mango's also then add them to the cherries in the pot.


Turn on the burner to medium and add the lemon juice while stirring until it is mixed. Now start to smush your fruit. This is time consuming just smash your fruit to the consistency that will make you happy. I like to taste pieces of fruit in my jams.

I use a potato smasher to get my fruit smashed.


I had chopped my mango's so they were the right size the m ashing helped get the flavor of the mango throughout the jam. Cherries were the many flavor I was after with the tingle of mango's.

Once you have the right consistency and the gel point get your jar's ready and get that yummy jam into the jars.

Fill your jar's 1/4 inch from the rim of the jars. Wipe them clean around the rims and cap them.


Give your jam a 12 minute water bath. Remove the jars and let them cool for 24 hours. Take off the twist top and clean the jars. Label and store in a cool area for up to one year.


Disclaimer: This is not an all inclusive recipe for making jam. You should have a basic knowledge and understanding of the canning process before proceeding. Please consult your local Center for Home Preservation for additional information and available classes. 

6.25.2016

Balsamic Cherry Jam


Balsamic Cherry Jam yes in-deedy !

Hello Cherry Lovers. It is that time of year again when those luscious Washington Cherries are available. I am blessed every year to be one of the lucky jam makers to get a shipment of Rainer Cherries from the Washington Fruit Board.

I have been cookin' up recipes for their delicious cherries for two years. I am always honored to use their wonderful fruit in my jam's.


This year the recipe came from the original Balsamic Strawberry I brewed up a few years back. The thought of the balsamic vinegar mixed with the deep delicious cherries just could not leave this jammin' brain. So here we go.

Ingredients

7 cups of chopped cherries
1 1/2 cup's balsamic vinegar (reduced to 1 cup) 
Juice from one lemon
2 cups of sugars


As most of you know I am not a pectin person. The pectin recipe's call out for far more sugar than any jam should have. I do larger batches and use the good old fashion boil to the gel point like Grandma Lois did.


The first thing you want to do is get your balsamic vinegar into a small sauce pan. Bring it up to a boil and then take it down to a mild simmer. This will reduce your vinegar to a thicker syrup and give it a  richer flavor. Keep an eye the vinegar while you prepare the rest of your ingredients.


Put your cherries into your non reactive stainless steel pot. Let them get warm and add the lemon juice. Then proceed to smashing them.
Keep it on a low simmer and while smashing you will get more juice from your fruit. 


I use a potato smasher to get them to the consistency I like with out pulverizing them.

This is a picture from my Apricot Blackberry Jam !


Once you get your cherries to the consistency you like you are ready to add your vinegar and sugar.

Keep the jam on a boil you can not stir down. If you have a candy thermometer use it. A good gelling jam will come to a gel point of 222 to 223 degrees.


The beautiful rich color I got from this combination is amazing.


Once your jam has come to the proper gel point turn the flame off of the jam. Let it sit while you get the jar's and all ready. I let all my jam sit for a few minutes prior to pouring them into the jar's. The fruit has time to collect itself. This will prevent fruit from floating when they get out of the bath.


Alright if you are ready let's fill the jars. Fill them to 1/2 inch from the top of the jar. Wipe your jars rims clean place the lid and screw top on. Tighten them and put them into the water bath. Water-bath the jam for 12 minutes. Remove the jars from the water-bath and let them cool for 24 hours.


When they have cooled remove the screw top if storing. Wipe your jars clean again, label and store for up to one year. Once opened refrigerate.


Disclaimer: This is not an all inclusive recipe for making jam. You should have a basic knowledge and understanding of the canning process before proceeding. Please consult your local Center for Home Preservation for additional information and available classes.