Showing posts with label blackberry. Show all posts

6.01.2017

Three Berry Shrub with Lavender


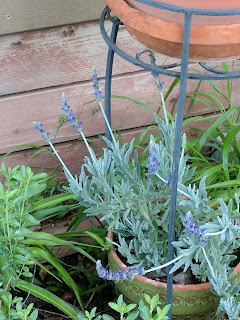
I am relatively new to the whole Shrub comeback. Perhaps I have just put so much time into the Jam World that all else has gone astray. I happen to have a beautiful Lavender bush or two in the yard and beside having it to scatter around the house for the smell and drying it out for recipes I never gave Shrub a second thought.

I did purchase a book all about Shrub and it's history and it is great. It is called Shrub (DUH) the author is Michael Dietsch.
It is great and the recipes are so scrumptious.


Ingredients

1 cup mixed berries
3/4 cup of sugar
3/4 cup champagne vinegar
4 springs lavender


I adapted the recipe from one in the book. It is different ingredients but the same principle.

First place all your berries into a bowl and add the sugar. Stir to combine and smash a bit to get the process going. Make sure the sugar dissolves prior to covering for the berry nap time.

Place the Berries and sugar in the refrigerator for up to 2 days.


Put your vinegar into a small separate bowl. Add your lavender sprigs to it and let it sit in a cool dark place for up to 2 days. Cover with a plastic wrap or cheese cloth either will do.

The point of the two bowls and the sitting is so the flavors join together prior to making a party out of them both.


It is pretty amazing how much of the vinegar the lavender soaks up. It is thirsty. After one day a full 24 hours you can add the vinegar to the berries. Let this sit an additional 24 hours n the refrigerator.


 I find that every time I open the refrigerator I try stirring and smashing the berries to get more juice.


Now is the time for you to strain your mixture.  Pour all your mixture into a strainer or a double layer of cheese cloth. You can even use a fine strainer. I have found that using a strainer like I use for my jelly is quite time consuming. It takes a couple of hours to strain through without help.

I encourage everyone to experiment with the process that works best for you. I have done my Shrubs several different way's.


When I used the jelly strainer I took it off when it was close to drained out and squeezed the dickens out of it. I then took the macerated fruit mixture and put it into a mason jar and froze it to use with another recipe.

I do not waste. I always try to find new way's to use stuff. Put your shrub into a bottle that has a secured top. I use a bottle that I use to keep vinegar in or what not. It has a small rubber gasket on the top to keep air out. Your shrub should be kept in the refrigerator and will stay good for up to 6 month's


Here you see a beautiful drink of soda water and shrub I added some Dehydrated Lemons and Blood Oranges. Oh yes and the snap pea's I made a Quick Pickled Snap Pea's fresh out of the garden.

Life is good!

12.01.2015

Apricot Blackberry Jam

This year's crop of Apricots was incredible. This Apricot Blackberry Jam rocks the toast. I get so busy canning when the season is on that I forget to post for you all.

But we were also lucky enough to grab some of the apricot's from Washington.

So Apricot Blackberry Jam here we come!


Remember it is never to late to look at and plan next year's canning calendar. I love to mix up my jam's. To create a jam that makes you actually imagine the way it looked on the tree. You do want to taste the fruit prior to adding the sugar to your jam.  It is all about the temperature.


 Ingredients yields about 7 half pints - 8 0unce Jars

4 cup of chopped apricots
3 cups of blackberries
1/4 cup of lemon juice
3 to 4 cups of sugar- depends on the fruit


I thought that the mixture of some sweet apricots and just slightly tart blackberries would do a palate good.

Wash your fruit and let it dry thoroughly
Water is not a jam's friend !

The first thing we need to do is chop up the apricot's. Not to small and not to large as we cook them down they will get small and we will use some of our tool's to accomplish the rest.


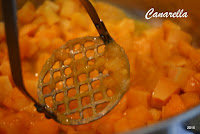
Place your chopped apricots and the lemon juice into a large stainless steel pot and simmer until they all get nice and warm. You can mush prior to adding your blackberries. In this little picture you see I turned to the old reliable potato smasher it always seems to do the job I need.


Alright moving on we have warmed our apricots pieces and lemon now it is time to add your blackberries. Stir in your blackberries and get those to the consistency you like.  


Once you have a rolling boil coming up start to add your sugar one cup at a time. Make sure you dissolve the sugar prior to adding another cup. Once it is all dissipated bring it backup to a rolling boil.


To get it up to the right temperature which is a sweet 223 to get the gel. Just keep it at a rolling boil but keep stirring it so you do not burn the bottom or get a thicker mix on the bottom.


Now it is time to turn the flame down and let your jam sit for a few minutes prior to filling your jars. Check the jam to see if it is set. This gives you time to get the jars out of the water-bath and scrape any foam off the top of the jam.

Ladle the jam into sterilized half-pint jars leaving 1/2 inch from the top. Wipe the rims clean, add lids and rings. Process in a boiling-water bath for 12 minutes.


Once done remove from the bath let them cool for 24 hours. Once cooled remove the ring (do not store with the ring on) wipe clean and store labeled for up to one year.

Disclaimer: This is not an all inclusive recipe for making jam. You should have a basic knowledge and understanding of the canning process before proceeding. Please consult your local Center for Home Preservation for additional information and available classes.     

9.06.2015

Blackberry Mango Jam


This Blackberry Jam is so tartly delicious. I do so love when we can combine a few flavors to get another person's palate wondering what is that! Jam making has become a true love of mine and the longer I do it the more in love with it I am. So let us get started with this simple and delicious jam


This will yield about 8 to 10 half pints of jam

Ingredients

6 cups of blackberries
3 cups of chopped mango's
4 cups granulated sugar
1/4 cup of fresh lemon juice
1 tablespoon of cinnamon (optional)
1 box powder pectin or not (get it to a gel point no pectin)


Get your Stainless Steel pot ready and put your Blackberries and chopped Mango together in the pot. Bring them to a nice simmer. You will see the blackberries breaking down and the juice just bubble with excitement.

Take your potato masher or any tool you use to break down the fruit and start to break them down.
You want to make the consistency of your jam to your liking. I like my fruit only broken down enough to make sure I get a nice bites of fruit in every bite. That is why we call it "jam"


Once you have it to the right consistency add your lemon juice and let this simmer for 5 minutes.
Now add you pectin mixture to the batch and turn up the heat. Bring your ingredients up to a rolling boil that can not be stirred down.  Keep stirring you do not want to burn the jam. Once the boil is up add your sugar and bring it back to a rolling boil you can not stir down. Get your jam to the gel point and turn the heat off. Let your jam sit for 5 minutes while to get your clean warm jars ready.


 Fill your jar until they have 1/4 inch of head space and wipe the rim clean. Wipe the top clean - seal and twist lid. Process for 10 minutes into water bath.

When done lift out of the water bath and let cool overnight or at least eight hours. Label and store no twist tie left on. 


Disclaimer: This is not an all inclusive recipe for making jam. You should have a basic knowledge and understanding of the canning process before proceeding. Please consult your local Center for Home Preservation for additional information and available classes.     

4.01.2015

Blackberry Jam with Strawberries

This Mixed Berry Jam is delicious and you can easily substitute any berry for the ones I have included.

When the season is fresh full with Berries of all kinds it is the time to Preserve and freeze the bounty you just scored.

Year around there is no end to the way you can use the jam.  Toast, Ice Cream, or just off the spoon.


With that let us get started.

Ingredients

3 cups of Strawberries
3 cups of blackberries
3 cups of sugar
1/4 cup lemon juice fresh
1 box of pectin ( or not)

Get all your stuff ready water-bath, jars, lids and twist tops Ah yes your Berries! Keep your jar's in the warm water-bath this way when you are ready to jar up your jam the jar's will be ready. As you Preserve More food's you will just naturally have all the stuff you need ready and waiting.


Clean and chop the strawberries in half. I do not chop my berries to much as a matter of fact I only chop my strawberries in half all other berries stay whole. I like my jams to be fruit filled. You should get a big taste and feel of fruit when eating jams. Also, the berries do break down as your cook them and if you wish you can always use an immersion blender to thin out your jams .


Add all your berries to your Non-reactive pot. Bring up to a slow simmer. Your blueberries will start to pop. All the berries will start releasing their juices. keep stirring the jam. this is the time to mush your berries. I use a potato smasher to get the berries to the consistency I love.


I using pectin now is the time to add it. I always mix my pectin with the same amount of sugar it seems to blend and meld in better. Bring this back up to a rolling boil. Keep stirring the potion. 

Once that potion has dissolved and your have a good rolling boil you can add the remainder of the sugar. I do this a cup or two at a time. I just love the clean shiny color it starts to get when the sugar is added. Ok bring your jam back up to a rolling boil. If not using pectin make sure you get this to the gel point. Usually a good degree is 220 with most jam to get to the gel point.

Once it reaches the gel point turn off the heat and let it sit for 5 minutes. This helps the berries to distribute more evenly through out the jam. While it is sitting skim the foam. Have your jar's ready? time to fill the jars. Ladle the jam into the jar's leaving a 1/4 inch head space. Wipe the jar rims clean put on the lid and twist band tighten them taunt. Place the jars into the water bath and process for 10 minutes. Once done turn of the heat and give them a few minutes then remove and let them cool for 24 hours. Once cooled remove twist band and store .


Oh Label Them with the Date.
Now make some toast and enjoy the jam you created! xoxo


Disclaimer: This is not an all inclusive recipe for making jam. You should have a basic knowledge and understanding of the canning process before proceeding. Please consult your local Center for Home Preservation for additional information and available classes.