Lime Marmalade a Marmalade for the true Tart Heads. I have made Marmalade for many a year. I took a class in Oakland back in the day and it will forever have taught me that an expert is the best person to learn from. There are many who call themselves "Expert's" and many other names but I find that a person who is skilled in a type of canning is the best to learn from. I learned my Marmalade Techniques from June Taylor of the Still Room.
Lime Marmalade
3 cups lime pulp
1 cup of lemon pulp
1 lime and 1 lemon sliced thin 1 cup (total)
1 cup thinly sliced lime peel (not rinds or pith just peel)
¼ tsp baking soda
1 cup of lemon juice & 1 cup lime juice
(fresh squeezed its best but bottled will do)
1 cup of water
5 cups of sugar again to taste I like 4 but I like tart
Gel to the gel point of 223 degreez to gel.
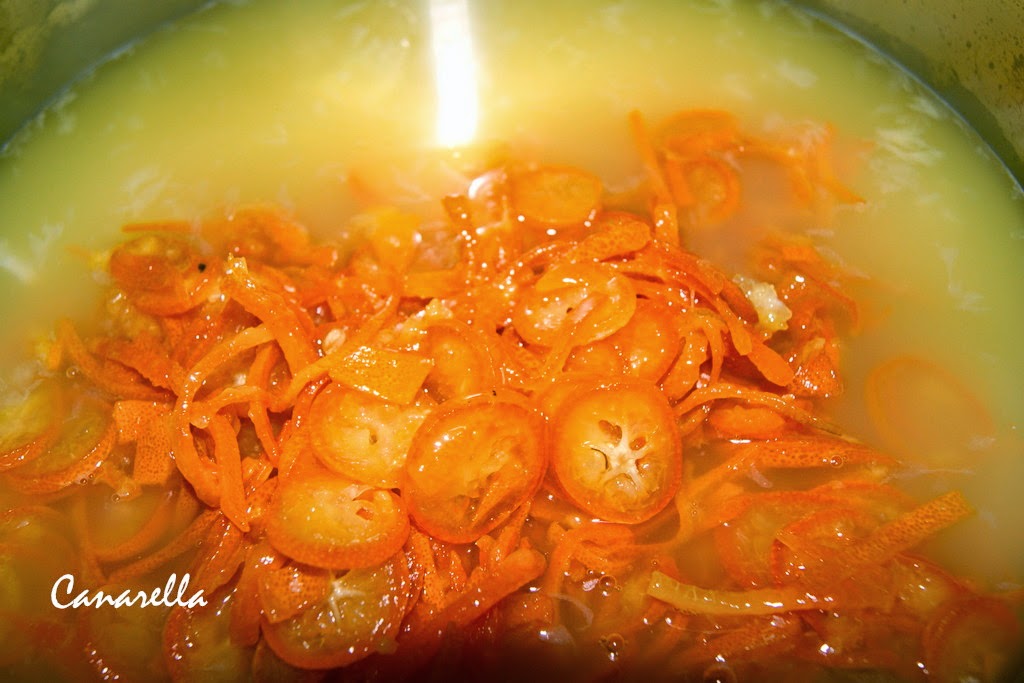
The first step to do is get the rind cut this is the only way to do
marmalade if you do not it does not have that little bit of tangy that
real marmalade peeps love! Thinly slice the 1 lime and the 1 lemon. The rinds retain their pulp. It comes to about a cup or so give or take.
This step is important do not skip this step.

Now take the slices/peels and cut them into quarters. Put the slices/peels in 1 cup of the
water and 1 cup of the lemon juice add the 1/8 tsp of baking soda and
put it in a small pot bring it to a boil. Turn it down and let it
simmer on low for 20 minutes this tenderizes the rind's.
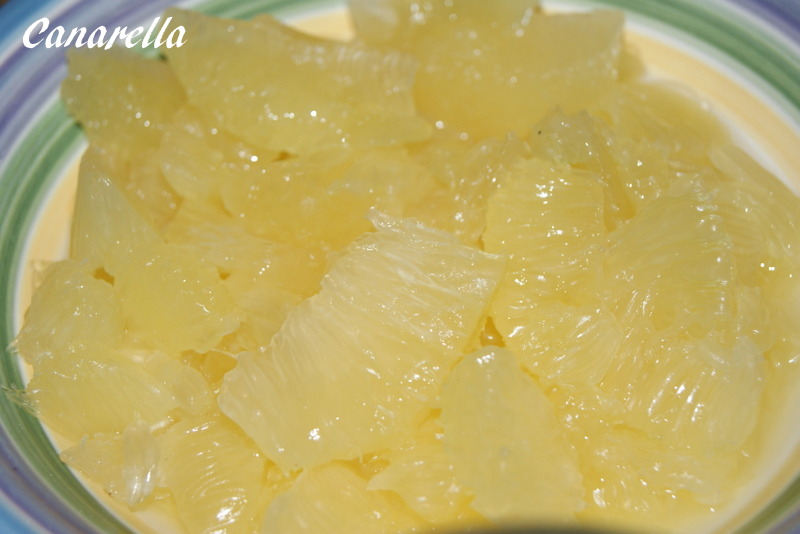
Here is a
link for sectioning your citrus.
There is a trick and it makes this job much easier. I will section many a
citrus to freeze for marmalade's and the like through out the year.
In the mean time cube up your limes and this is without the peel
cut enough to have 4 cups of lime chunk's but like all my tips you
make it the
consistency you like after all its your jam.
Just do not change the measurements.
Limes are small and tricky but in the ends the flavor tells it all!
Once the slices/peels have simmered add the rest of the liquid and the chunk's and the
pectin
to your large stainless steel pot. Let all the ingredients simmer together and bring them up to a rapid boil you can not stir down. Have your thermometer in place. Keep stirring for 5 to 7 minutes then turn down to a low simmer.
This is my mixture getting ready to come to temperature.
Beautiful color !
The picture that I am putting up with the thermometer is from my lemon marmalade. When I make a large batch of marmalade I will also make a bag of pectin while cooking the Marmalade. I wanted you to have a picture of the thermometer I use.
Here the link to
make your own pectin super easy and great way to waste nothing. It is all about the pith and seeds and left over citrus stuff!
Ok now back to the recipe. Bring this to a rapid boil it will begin to get a foam from the 5 to 7 minutes rapid simmer. Next step is to add the sugar slowly (Have your sugar measured out and
ready) and make sure that your sugar is dissolved completely between each cup. Stir it
over a gentle heat do not raise the heat to a boil until you are sure
the sugar is dissolved.
Once it has returned to a rolling boil just to gel point that should
be 223 on a thermometer.
When it is at it's roiling boil disturb it as
little as possible. Do stir to prevent sticking on the bottom of the pot. When you are checking to see if your marmalade has reached it's gel point 223 and is setting then turn the boil down. You do not want to over cook it if you do you will have a dark, dry and
rubbery marmalade.
Let your marmalade cool slightly this way (as with all fruit filled jams) when you jar it up it will
make sure the peels and guts get distributed evenly through out your
delicious marmalade. Ladle into jars leaving a 1/4" head space, wipe the
rims, cap and water bath time.
Give them a bath 15 minutes is my standard time

This
is a super one recipe. You do not need to add boxed pectin, let me
explain if you bring your marmalade up to a rolling boil with a candy
thermometer to 223 you will get it to the right gel point but this takes practice.
This picture is of my Orange Marmalade I did not take one of the Lime Marmalade when I was jarring it up. So this is just an example of what it will look like.
Practice makes perfect Marmalade it is a time consuming Jam so be patient and do not give up!
Disclaimer: This is not an all inclusive recipe for making jam.
You should have a basic knowledge and understanding of the canning
process before proceeding. Please consult your local Center for Home Preservation for additional information and available classes.

 I have been a part of a great Challenge this New Year of 2017 through the Food In Jars Website. Even if your not a part of it play along I am learning a lot. And remember Knowledge is power in the canning world!

 Alright y then just slice you citrus in 1/4 inch thin slices. Place your slices on your dehydrator shelves and dry on. My dehydrator has no temperature so I dry until my stuff is dry no moisture left. I also will take the tray's and put them on the table for a day or two to let the citrus air dry more. Seal them into air tight container and use in you water, cooking there are so many uses but that is yet another post!


