Showing posts with label blueberry. Show all posts

8.24.2021

Blueberry Ginger Jam


Blueberry Ginger Jam that sounds delicious. I do not ever seem to have a lack of blueberries. The season bring me such a nice amount. This jam is a twin of the Blackberry Ginger Jam we make and this blueberry is our #1 seller. Remember to always freeze fruit when it is in season this way when it is cold and the berry vines are sleeping you have what you need to make jam all year around.


Let us get started with this Blueberry Ginger Jam. My sister Casey came up wit this recipe she was a Ginger Lover.


Ingredients

6 cups of whole blueberries
1/2 cup finely chopped ginger
zest of one lemon
1/4 cup lemon juice
4 to 5 cups of granulated sugar

* Makes approximately 7 half pint jars

Put your blueberries and half of the sugar and the lemon juice into your pot and start this on a low simmer. This will release some of the juices from your fresh blueberries. While they simmer use a potato smasher to crush the blueberries.

Before you start get your ginger cut and ready. 


The easiest way to peel ginger is to use a spoon. Take the spoon holding the bowl of the spoon toward the ginger and scrape in a downward motion. This makes it quite easy to peel.  Ginger is full of fiber so the smaller you can chop the better.


Now chop your ginger into small pieces. They should be small yet able to be seen. The ginger is so delicious in this jam. This picture is only to show you the size. I chop lots of ginger then freeze it for my jams and cooking. But that is another post.


Now that your ginger is chopped add it to the pot stir and then add the the remaining blueberries, sugar and lemon zest. As most of you know we do not use pectin.


I let all my jams gel naturally. Just take it slow and get the mixture up to 223 degrees and that will do it. For now keep this mixture at a simmer and make sure everything is getting along in your pot. The picture will show a larger amount of blueberries then you have prepared but I make double batches. 


If you want to thin out your jam now is the time. I use an immersion blender. Do not go crazy and make it to thin. Although some people do like it that way. 

I like chunky jam that has texture and great taste. 


Now it is time to get your batch up to a good rolling boil this will bring your jam to the right temperature to gel. And to know it use a candy thermometer. You must stay with your jam and stir so it does not stick to the bottom of you pot and burn.


Once your jam is up to temperature turn off the heat and let your jam rest for 5 minutes. This will tell you if the gel is right. Once it has set in the pot for the 5 minutes you will notice when you run your spoon across the top there is a thin layer. It is like when your hot chocolate gets a film on it. That will let you know it is ready to go into the jars. 


Now take your warm jars and fill them until they are about 1/2 inch from the top of the jar. Once filled wipe the top rims of the jars to eliminate any excess jam that may have dripped. The jars need to be clean when you put on the twist and top. Alrighty now that the jars are filled and clean you can top and twist taunt the lids.


Place your jars into a rapidly boiling water bath and let them sit for 12 minutes. Once done turn off the heat let them sit for an additional 5 minutes. Remove your jars place them on a towel on the counter and let them cool for at least 8 hours. Once cooled remove the twist and clean the rim. Label and store for up to one year in a cool dry pantry or cupboard. Never store your preserved food with the twist on. 


6.01.2017

Three Berry Shrub with Lavender


I am relatively new to the whole Shrub comeback. Perhaps I have just put so much time into the Jam World that all else has gone astray. I happen to have a beautiful Lavender bush or two in the yard and beside having it to scatter around the house for the smell and drying it out for recipes I never gave Shrub a second thought.

I did purchase a book all about Shrub and it's history and it is great. It is called Shrub (DUH) the author is Michael Dietsch.
It is great and the recipes are so scrumptious.


Ingredients

1 cup mixed berries
3/4 cup of sugar
3/4 cup champagne vinegar
4 springs lavender


I adapted the recipe from one in the book. It is different ingredients but the same principle.

First place all your berries into a bowl and add the sugar. Stir to combine and smash a bit to get the process going. Make sure the sugar dissolves prior to covering for the berry nap time.

Place the Berries and sugar in the refrigerator for up to 2 days.


Put your vinegar into a small separate bowl. Add your lavender sprigs to it and let it sit in a cool dark place for up to 2 days. Cover with a plastic wrap or cheese cloth either will do.

The point of the two bowls and the sitting is so the flavors join together prior to making a party out of them both.


It is pretty amazing how much of the vinegar the lavender soaks up. It is thirsty. After one day a full 24 hours you can add the vinegar to the berries. Let this sit an additional 24 hours n the refrigerator.


 I find that every time I open the refrigerator I try stirring and smashing the berries to get more juice.


Now is the time for you to strain your mixture.  Pour all your mixture into a strainer or a double layer of cheese cloth. You can even use a fine strainer. I have found that using a strainer like I use for my jelly is quite time consuming. It takes a couple of hours to strain through without help.

I encourage everyone to experiment with the process that works best for you. I have done my Shrubs several different way's.


When I used the jelly strainer I took it off when it was close to drained out and squeezed the dickens out of it. I then took the macerated fruit mixture and put it into a mason jar and froze it to use with another recipe.

I do not waste. I always try to find new way's to use stuff. Put your shrub into a bottle that has a secured top. I use a bottle that I use to keep vinegar in or what not. It has a small rubber gasket on the top to keep air out. Your shrub should be kept in the refrigerator and will stay good for up to 6 month's


Here you see a beautiful drink of soda water and shrub I added some Dehydrated Lemons and Blood Oranges. Oh yes and the snap pea's I made a Quick Pickled Snap Pea's fresh out of the garden.

Life is good!

3.19.2017

Blueberry Lavender Shrub


This is the first Shrub I ever attempted. It is part of the FIJ Challenge I am participating in. All that information is at the end of this post. I have heard of Shrub's through my canning time but never attempted it.

What is a Shrub you ask? That is such a very complex subject that I will have to try to break it down. My answer is a bit simple but to the point. It is a fruit and vinegar based drink additive. It is simple to make and delicious to add to any beverage.


But the word Shrub itself is long lost relative of the Arabic word Scarab! 

It's complex but the history is fascinating.

I got the book Shrub by Michael Dietsch.

And that is where we will start with a simple and delicious Shrub going by the name

Blueberry Lavender Shrub. 


Ingredients

1 Pint of Blueberries
1 Cup of Sugar
8-10 Lavender Sprigs
1 Cup Apple Cider Vinegar

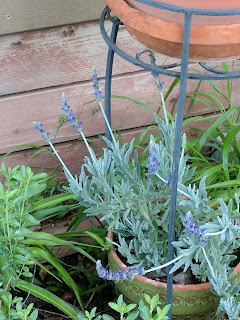
To start I am lucky to have some beautiful lavender in my garden.


Wash your blueberries and lavender !


To start in 2 separate bowls. Place your blueberries into the bowl with the cup of sugar and crush then stir the two ingredient's to combine them.

Cover the bowl and let it sit in the refrigerator for up to 2 days. You can check it each morning and crush or stir as needed.


Next in the other smaller bowl put your vinegar and lavender sprigs.
Make sure the bowl is non-reactive store this in a dark and cool area. I use my pantry. No refrigeration necessary!


I did the straining a bit different than the book called out. I gathered all the necessary equipment. My stuff , the book, strainer and bottles the scrub will go into.

First I removed the lavender sprigs smooched them to remove any yummy liquid tossed the sprigs into the compost bin. I mixed my vinegar into the larger bowl with the blueberries and stirred it and let it sit for a few hours to mix together in merry mix-time!


I let this sit for 2 hours it was a happy mix ! I used my hands to mush more. I always glove up when doing any kind of preserving.


I don't care how many time I wash my hands I want to know nothing got into my jar's but the ingredients.


 Alrighty now it is time to strain.


Position your fine-mesh strainer over the bowl. Your bags should let most of the liquid go thru. It takes a while so leave it to drain naturally. This could take an hour.


I smooched the bag. I found this time the looser I left the bag in my hands to smooch the better it released the liquid. 


 No sure yet what but something will come to mind. I waste nothing.


The smooch stuff that is left I put into a small bowl as you see right to the left. Oh and note the gloves LOL. I froze the smooch so I have time to decide what to do with it. I think to blend it and make a nice marinate might be great!  


I chose a couple of bottles to store it in. One is just the standard Salad Dressing bottle the other is one from my collection of bottles. I never throw away a good bottle. the uses are endless.

Well I sure did enjoy this Challenge from Food in Jar's. I still need to get some Jelly made. I will attempt this perhaps this afternoon.


Disclaimer: This is not an all inclusive recipe for making jam. You should have a basic knowledge and understanding of the canning process before proceeding. Please consult your local Agricultural Extension Service for additional information and available classes.


7.06.2015

Blueberry Pineapple Jam


Blueberry Jam with Pineapple Recipe this is a winning combination. I seem to always mix up my jam's. The season is here and all jam's we make right now are like a candy store delight.

This Blueberry Pineapple Jam is a simple jam as are most once you get the hang of preserving jam.

So let us create some Blueberry Pineapple Jam.


I found a tool that cuts the Pineapple and it is so simple and easy. Cutting is always what held me back from using pineapple. When I cut is I come out with about 30 % less then when using this tool Avon Pineapple Cutter


Ingredients

6 cups of blueberries
3 cups of chopped pineapple
4 cups of sugar
1 box powder pectin
1/4 cup fresh lemon juice


Once your fruit is measured put it and the lemon juice into a large stainless steel pot and bring to a rapid boil. Please stir it so it does not burn.


Look at the beautiful color change as it cooks.


Mix pectin with half cup of your sugar I find when it is mixed it incorporates better. Once your fruit is at a rolling boil add your pectin mixture and bring back to a boil.


Add the sugar into the fruit mixture and cook over high heat continuing your boil, stirring constantly. Continue until your have reached the gel point.


 Remove from heat. Skim and stir to remove foam. Ladle jam into hot jars  leave 1/4 inch head space. Wipe the rims and seal.Give them a 15 minute bath.


 Disclaimer: This is not an all inclusive recipe for making jam. You should have a basic knowledge and understanding of the canning process before proceeding. Please consult your local Center for Home Preservation for additional information and available classes. 


6.16.2015

Cherry Blueberry Jam

 
Well this Cherry Jam experiment is just getting better every day. I cannot seem to stop loving all the way's I have chosen to create new cherry jam's. Now do not get me wrong people have made plenty of Cherry Jam's on the Web but mine take it one step further.

Here I have taken the Cherry and added it's friend the Blueberry making a dark warm Jam truly a gift to your toast.


Or on top of a big bowl of Vanilla Bean Ice Cream. Yup ! Oh yes again let us thank The Washington Fruit Commission and Sweet Preservation for their cherries and trust in my ability to make them Cherry Happy.

Ingredients

4 cups of cherries
3 cups of blueberries
1 lemon
4 cups of sugar


Clean, pit and cut your cherries in half. Now rinse them again. Chop your cherries to the consistency you like. We all know I love thick jam. When you are cooking them the skin will dissipate a bit. Watch for pit's. They do not float like citrus seeds. 


Cut your lemon and squeeze the dickens out of it. I squeeze it right into the jam when cooking. Watch for seeds. 


Start you batch by putting your clean chopped cherries into a non-reactive pot and turn the flame on medium heat.


Add you 3 cups of Blueberries and your lemon juice.


 By now you have your blueberries and lemon added and have your jam going at a nice simmer. Time to add your sugar. Bring the jam mixture up to a rolling boil and add your sugar one cup at a time. Between cup's stir and let the sugar dissolve prior to adding another cup. Do this until all the sugar is added and then bring it back up to a rolling boil.


Gel times differ if you use no pectin or pectin. No pectin needs to be brought up to a boiling point of 223 degrees. Pectin is to the boiling point. Here is a pectin not pectin link to help you if needed.


Now it is time to scrap the foam off and get to jarrin' up. Turn off the burner and let your jam sit for 5 minutes this helps the fruit not to float to the top of the jar once water-bathed. Scrap off the foam and have your jars ready.  Ladle into 1/2 pint jelly jars till 1/4" from the top of the jar. Wipe your jars clean and cap and water bath them for 12 minutes.


Take the jams out of the water bath and let them cool overnight. Once cooled take  the ring off wash and store in a cool spot. Your jam's will be good for 6 to 9 months. Once open put them in the refrigerator and enjoy.

Disclaimer: This is not an all inclusive recipe for making jam. You should have a basic knowledge and understanding of the canning process before proceeding. Please consult your local Center for Home Preservation for additional information and available classes.

1.20.2015

Blueberry Mango Jam

Blueberry and Mango Jam this is a good combo. Blueberry Jam has to be one of my favorite Jam and the list of add on's are endless. Mango is one thing that is ready available here in California half the year. Well let us get started with this delicious Jam.


This will make app 8 to 10 half pints.


Ingredients

6 cups of blueberry
3 cups chopped mango
5 cups of granulated sugar
1/4 cup fresh lemon juice
1 tablespoon of cinnamon (optional)
1 box powder pectin


Get your Stainless Steel pot ready and put your Blueberries and chopped Mango together in the pot. Bring them to a nice simmer. You will see the blueberries breaking down and the juice accumulate.


Take your potato masher or any tool you use to break down the fruit and start to break them down.
You want to make the consistency of your jam to your liking. I like my fruit only broken down enough to make sure I get a nice bites of fruit in every batch for each jar. That is why we call it "jam"


Alright now that you have it to the right consistency add your lemon juice and let this simmer for 5 minutes.


Now add you pectin mixture to the batch and turn up the heat. Bring your ingredients up to a rolling boil that can not be stirred down.  Keep stirring you do not want burnt jam. Once the boil is up add your sugar and bring it back to a rolling boil you can not stir down. Get your jam to the gel point and turn the heat off. Let your jam sit for 5 minutes while to get your clean warm jars ready.


 Fill your jar until they are 1/4 inch of head space and wipe the rim clean. Top with your seal and twist lid and process for 10 minutes into water bath.

When done lift out of the water bath and let cool overnight or at least eight hours. Label and store no twist tie left on.


Disclaimer: This is not an all inclusive recipe for making jam. You should have a basic knowledge and understanding of the canning process before proceeding. Please consult your local Center for Home Preservation for additional information and available classes.    

6.16.2013

Apricot Bluberry Jam


You all know it is time for Fair and I am on a mission. Through out the years I have entered the Fair and done pretty darn good. Last year I won 16 ribbons. BUT this year I want a God Damn Best of Show.

Try as I might I can not bribe the judges make nice is the best I can do when dropping off my goods. Last year I made nice and happened to meet two wonderful women.


Well you know the Apricot story I always seem to find the best places to pick them. My last Mother Load made a batch of Apricot Butter and it was my first time making that . I thought it was a bit runny but sometimes when I let my jams sit they thicken up all by themselves.

Ingredients

2 quarts of uncooked chopped apricots no I do not peel my fruit but you can
2 cups fresh blueberries

1/4 cup of lemon juice
5 cups of sugar


Preparation:


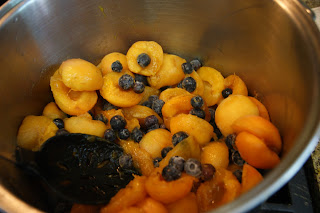
Combine your apricots, blueberries and lemon juice in your sauce pot. Bring slowly to a simmer. Now add your sugar and stir until you have dissolved all the sugar. Bring to a rapid boil.


 We do not add pectin to our jam's because we like to keep the jam as close to nature as possible. I have post on How to make your own Pectin and reasons why we do not use it. Once you have the rapid boil and the foamy stuff going on. Keep it at the boil until you get to your gel point. Without pectin it needs to get to about 223 degrees with a thermometer.

Now remove your jam mixture from the heat. Ladle into your clean, hot, sanitized jars leaving your 1/4" head space. Wipe the rim of the jars, Adjust your two piece cap and process in the water bath for 15 minutes.

Once removed let them cool overnight or all day for you night canner's. Take the twist top off once cooled and wipe the rims and store with out the twist. Also please do label and date the jam. Here is another Post on this great jam from Renee go looky see!

Disclaimer: This is not an all inclusive recipe for making jam. You should have a basic knowledge and understanding of the canning process before proceeding. Please consult your local Center for Home Preservation for additional information and available classes.

10.04.2012

Strawberry Blueberry Jam

Blueberry Preserves I just love them. Jams are so thick and full of flavor. Preserving Strawberry Blueberry Jam is a pretty simple recipe. I have been creating different jams for years but I just realize there is no post for this one.

When blueberries and strawberries are in season out here I buy as much as possible and freeze them to make jam year round.

Look how fat these babies are!


Ingredients 

5 cups strawberries
3 cups blueberries
1/4 cup fresh lemon juice
1 box powder pectin
4 cups sugar


Once your fruit is measured put the fruit and the lemon juice into a large stainless steel pot and bring to a rapid boil. Please stir it so it does not burn.


IMG_1110.JPG
You can break up the fruit with a potato smasher or an immersion blender. Either works. I love both methods and use both. 


Mix pectin with half cup of your sugar I find when it is mixed it incorporates better. Once your fruit is at a rolling boil add your pectin mixture and bring back to a boil.


Add the sugar into the fruit mixture and cook over high heat continuing your boil , stirring constantly. Continue until your have reached the gel point. You can see by my pictures that I love jam that is fruit friendly. I do believe true jam people do so love to have a big piece of fruit on their toast or piled on top of a bowl of ice cream. Wait or in a cookie it is endless what you can do with your jams.


Remove from heat. Skim and stir to remove foam.  Ladle jam into hot jars leave 1/4 inch head space. Wipe the rims and seal.Give them a 15 minute bath.


It gelled so beautifully


Today was busy I canned the Fermented Sauerkraut in the jars. And started some Hot Sauce another fermenting adventure.

 Always be safe and be clean!


Disclaimer: This is not an all inclusive recipe for making jam. You should have a basic knowledge and understanding of the canning process before proceeding. Please consult your local Center for Home Preservation for additional information and available classes.