Showing posts with label pressure canning beans. Show all posts

1.08.2014

Pressure Canning Lentil Soup


Lentil Soup who does not love this creamy delight.
Making Lentil Soup and Pressure Canning Lentil Soup it is easier than you think.


Making Lentil soup is a pretty simple option as lentils do not pressure can and stay firm. Lentil beans are so good for you it is a must in any pantry. Lentil's are full of protein and high in fiber and we all need that. So lentil soup is grand. I experimented with lentils for months and soup is the only option. This lentil soup option is magnificent. This lentil soup is so tasty and filling on a cold night. Just darn right delicious.

Enjoy it all season long. I do mine in Quart jar's because there always seems to be more people at the house when I open one. Plus the next day and all week long you can enjoy this soup with any meal. The beauty of pressure canning your soup is that you always have a jar of delicious soup any time you want. No can - no preservatives and you will like that.

Ingredients

3 lbs of dried lentils - each pound of dried beans makes 5 cups cooked beans
8 garlic cloves, finely chopped
2 celery sticks, finely chopped
2 red  onions, finely chopped
Chicken Broth enough to cover beans.
* Have additional ready in case you need more broth to fill the jars.
black pepper to taste
salt to taste
1/2 tsp dried oregano

With regards to seasoning your soup. Keep in mind that you can always add more when you eat it. You can add more seasoning's but you can not take it out!


Chop up all your ingredients and have them ready.


Prior to starting this project you need to prepare your beans. You can get complete instructions on this post. It is very, very important.  


Many sites say lentils and split peas do not require soaking because of the speed of the cooking and how soft they become. But I disagree who want's dirty soup? The purpose of this recipe is to make a lentil soup and personally lentil's are far to small and mushy to can like regular bean's. But in all other blog's defense it can be done just not here. If you do anything at least clean them! I only soak my lentils for two hours.


 Alright your beans should be cleaned and we are now ready to start this project. Take your clean beans and put them into your stock pot.


Cover your beans with the chicken broth and add the remaining ingredients to your pot. That is your garlic, celery and onion. You can add your seasoning now or add to each jar the spices you wish. About a 1/4 teaspoon each depending on the spice.


 Add additional chicken broth to cover completely. Warm the mixture for 15 minutes.


 Once warm take your prepared jar's and fill with beans using a slotted spoon until the jars are about 3/4 of the way full.


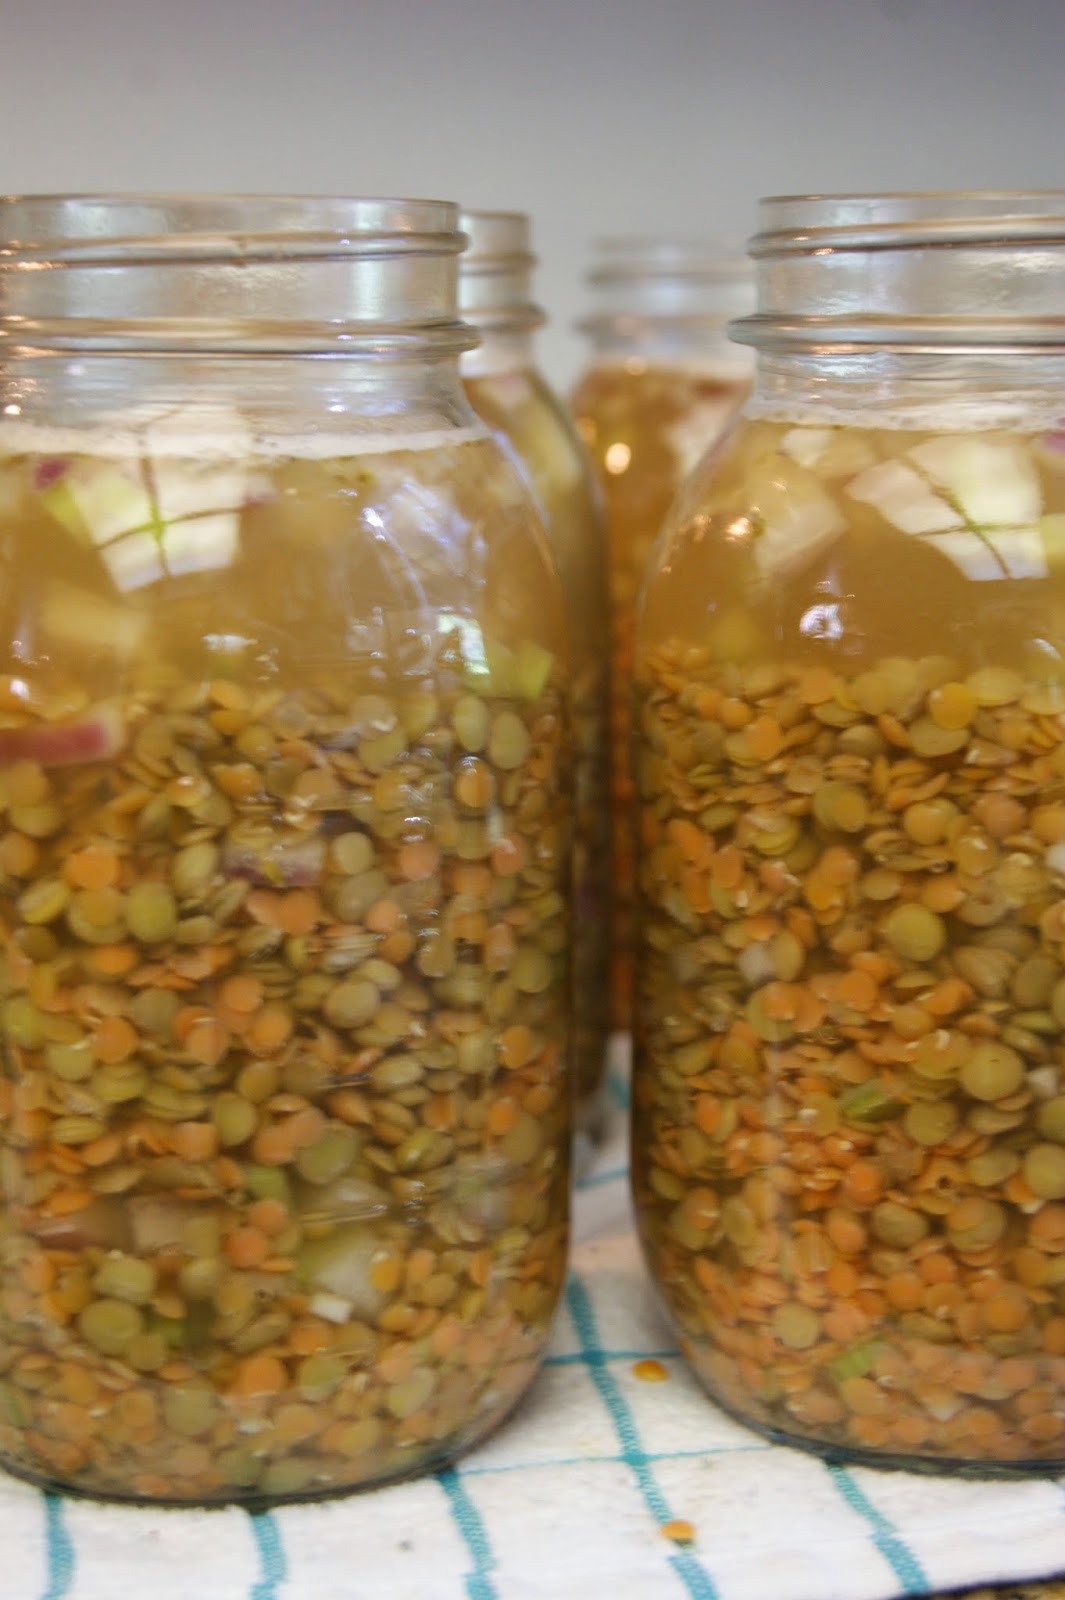
Fill remaining space in jar with liquid until you have a little more than one inch of head space. Wipe the rim's of your jar's, Place your seals and twist band's. Tighten the bands taunt. Place in your pressure cooker and cook until done. Pressure can pint's at 11 pounds for 75 minutes and Quart's for 90 minutes.

This recipe will make you approximately 8 quarts 


Almost there this is my gauge thought you might like to see it


Enjoy this Winter delight all year when you pressure can!

Also Presto has a great site for information and recipes. 


Disclaimer: This is not an all inclusive recipe for making jam. You should have a basic knowledge and understanding of the canning process before proceeding. Please consult your local Center for Home Preservation for additional information and available classes.   

11.10.2013

Pressure Canning Garbanzo Beans

I love garbanzo beans.

Pressure canning garbanzo made perfect sense to me. This was a really easy project. The way's to use them after you have canned them is endless. If you just happen to be the one person who does not care for this little beans I am going to convert you today.


I am really glad to have learned how to pressure can. It was a big fear at first now I look for foods to preserve and know what is in the jars. It sure saves a trip to the store when I am in need ingredients for a food project. 


Ingredients

5 pounds of soaked beans this started as 3 pounds of dry
1 quart + chicken broth
1/4  teaspoon of lemon pepper per pint (or any seasoning you prefer)
Garlic clove 1 per pint or to taste

This will provide you about 8 pint jars


 Clean and Soak your beans overnight. This is in my opinion one of the most important things to do when processing beans. Unlike the other beans we have done these guys are pretty clean. I changed the water only once. They did not expand as much as the other beans either.


Once the beans have soaked clean them and put them into a large stainless steel stock pot. Cover the beans with water so they are cover by one inch.

I also added a quart of chicken stock to this mixture.  I use chicken broth because it give a great taste with any dish you may be creating. You can use just plain water should you not desire the broth.


Once the beans are cover let them come to a low boil for 7 to 10 minutes. Never bring any beans to a rapid boil all beans can split or loose there skins. Makes the final product mushy. But if you are going for soup what the heck! Now after 7 to 10 minutes turn the burner to low and let them sit for an additional 10 minutes. This give you the time to get all your stuff ready to pack the jars.


The beans will create a foam on the top once simmered. It is familiar to the foam you get from preserving jams. Just scrap the foam off when you are ready to jar your beans.


I have decided to use pint jars for this project.
Here is the beans in the stock after scraping off the foam.


Fill your jars with beans. Use a slotted spoon it makes it easier. Only fill until your jars are approximately 3/4 of the way full. They will expand and need room.


Now add you seasoning just prior to adding the liquid. Be creative and use the seasoning that appeal to you. Use only a 1/2 teaspoon until you know how they will taste after.


Keep the liquid at least one inch to one and a half inch's from the top of the jar.  Wipe the rims of your jars. Add the metal lids, and tighten the rings. Make sure you pressure cooker is hot and the seals of your jars are secure.


If you add 2 tablespoons of white distilled vinegar to the water it will prevent a white film that comes from the process on to the jars. No harm no foul.

Add the jars one by one making sure they do not touch.


Process your jars at 11 pounds of pressure. Pint's for 75 minutes and quarts for 90 minutes. Once this time is done let your pressure canner cool completely by letting the dial gauge drop to zero. Carefully take the gauge off and take the top of the pressure canner off. Please make sure you take it off facing away from your face so the steam does not give you a super spa facial.


Let the jars cool for 15 more minutes prior to taking them out. Let them cool overnight or until they are completely cool. Once cooled remove the twist portion of the top and clean the jars. Label with contents and date and store in a cool dry area. Once opened refrigerate.

 * Pressure Canning Website I use is the Presto.

Disclaimer: This is not an all inclusive recipe for making jam. You should have a basic knowledge and understanding of the canning process before proceeding. Please consult your local Agricultural Extension Service for additional information and available classes.  

6.19.2013

Pressure Canning "Bush" Beans Recipe


Well this Pinto Beans post turned into three others. I wanted to give the beans a try. So in my usual over the edge way I went to the local organic store and got pounds and pounds of various beans. Look go Big or go Home~


I started with pinto and red beans I made a Mock Bush's recipe from a few links I found on line. The one thing I and every one else in America loves is the Bush Beans and I think I came pretty close to duplication them

Here is the "Secret" recipe

Soaking beans

 Take your dried beans and soak them over night while you gather the other ingredients. Put your beans in a bowl large enough to give the beans about three inches of room they expand. You will add more water and they will keep growing. But once they stop just make sure they have water covering them until you are ready to can.


Mock “Bush” Baked Beans
Makes 7 quarts

4 pounds of dried beans ( I used red and pinto)
One finely chopped onion
3 pieces of crisp cooked bacon chopped

Liquid for Beans

4 cups of liquid from beans cooking
( Keep reserve liquid from beans as extra if needed )
¼ cup dark molasses
½ cup brown sugar
¼ cup apple cider vinegar
¼ cup maple syrup
1 teaspoon garlic powder
1 cup tomato sauce or ketchup
1 teaspoon kosher salt
1 teaspoon ground fresh pepper
1 tablespoon dry mustard


Secret Sauce tee hee


Simmering beans


Take 8 cups of your soaking beans and put them into a large stock pot and simmer until you get a foam on top. I skim the foam like jam also take out any floating beans or shells.  Also look for icky ones and remove them. Once the beans have been simmered turn off the heat and set them aside.


Prepare your liquid you may end up with extra but you should not come up short. Combine all your liquid ingredients and bring them up to a soft boil. Taste it after about 10 minutes of simmering to make sure you have the taste you like. You can add more of any ingredient but keep in mind you cannot take ingredients out once added. 
You want just keep the liquid the beans have cooked in so you have enough to fill the jars.


Chop your cooked bacon

Have your chopped onion and bacon in a small bowl ready to add to the jars. I add these to the top of the  jars once I have added the beans prior to the liquid. Do not worry it is raw onion and cooked bacon the onion will cook in the pressure canner.


Fill you clean warm jars with less than 3/4 of the beans because you will top each jar off with a bit of onion and bacon. Make sure the ingredients fill the jar to 3/4 full you will need the extra room during the pressure cooking process. The beans grow and use up room and thicken the sauce. If you fill more than it will not seal. Fill the jars with the liquid leaving a little more then one inch from the rim with the liquid. Wipe the rim of the jar with a clean cloth. Now put your two piece top and screw band on and place carefully into you pressure canner. Seal and go!


Do not crowd your jars
Bring the Pressure canner to a steady steam flow for 10 minutes it clears the air out of the canner. Once 10 minutes has passed pop on the pressure cap and pressure for 65 minutes at 11 to 13 pounds of pressure.  Once the time has passed let your canner cool until the presume is down to ZERO and the steam cap has fallen. Turn and take your top off tipped away from you and let the jars sit in the cooker for about 15 minutes then remove and place on a heat safe counter and let them cool for 24 hours. Once cooled room let the twist part of the top wipe clean and store in a cool place for up to 9 months. .

NEVER LEAVE YOUR PRESSURE CANNER UNATTENDED WHEN CANNING


Disclaimer: This is not an all inclusive recipe for making jam. You should have a basic knowledge and understanding of the canning process before proceeding. Please consult your local Center for Home Preservation for additional information and available classes.