Showing posts with label cherry jam. Show all posts

8.31.2017

Italian Plum and Cherry Jam


A Washington Fruit you mean so much to me! Every year as you all know I am blessed with the gift of stone fruit from Washington. At the beginning of the season I got a load of killer delicious cherries. With that I made some great Jam's. But my little caning mind said

"Hey Canarella freeze some of these Cherries for later in the season when more stone fruit arrives and mix up a Stone Fruit Party!

Washington State Fruit Commission I love them !


And in come the Italian Prunes but for reason's we all know we can changing the name to Italian Plum's because they are not yet shriveled! Thus we have the Washington Stone Fruit Late Season Party other's will know as Italian Plum and Cherry Jam.

Let us head to the Big Copper Kettle and get to Jammin'

Ingredients - Make app 8 half pint jar's
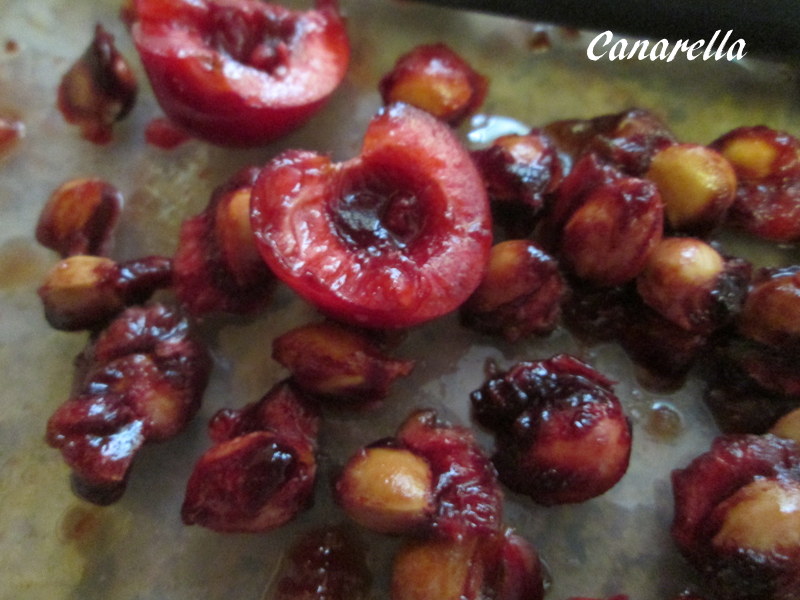
Clean you fruit

6 cups pitted and chopped Italian Plums
4 cups pitted shopped Cherries
1/4 cup lemon juice
2 cups granulated sugar


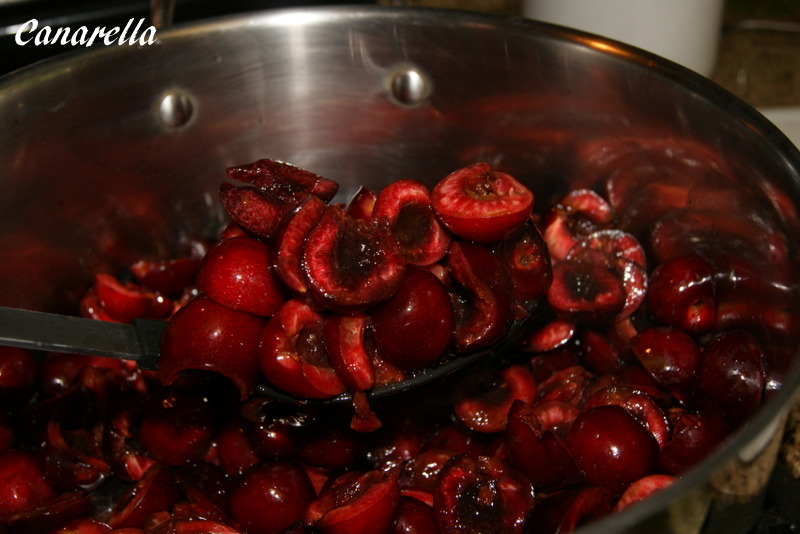
Put your clean, chopped stone fruit into your pot. Make sure it is non-reactive. I have a beautiful copper kettle my hubby got me a few year's back. That is another post.

Add your lemon juice to your fruit keeping the heat on low to medium you want to slowly cook your fruit to soften it for smashing. The longer you cook it down the more natural juice you will get from the fruit. It is a magical process.


My jam's are non pectin jam's. I have used pectin in the past and many of my recipes call out for it but through the year's I have found more taste, less sugar and a beautifully set gel to most of my jam's.

The trick is heat. Be patient any good jam is not something I want to rush if your in a rush get out of the kitchen. Alright your fruit should be softening up to be able to start crushing. I use a potato smasher and an immersion blender. I start with the potato smasher to because I do not always want to blend the fruit to much. I want you to have a nice piece of fruit to see and taste when eating my jam's.


Here are my two magic tools.


Alright moving on you want to get the consistency of your jam to what you like best. Now it is time to add your sugar and get the jam up to temperature. Add you sugar one cup at a time and keep the flame on high. You want a boil you can not cook down. Your thermometer should get to a temperature of 223 degree's to gel.

Here is a link to the whole Gel Point Topic. This post will lead you to the Make your own Pectin post and the good old Pectin or No Pectin Post!


Well now back to our Jam. Now that you have added all your ingredients and have it up to a good temperature turn off the heat and let it sit for 5 minutes. Now if it is gelled it will get a nice film on top but no worries it will still be hot enough for your jars and you can easily stir in the little film. It looks beautiful!


Have your jar's ready. Cover your counter to protect the jar and the counter. Fill your jar's to 1/2 inch from the top. Wipe the rims. Place the lid and twist top . Twist it taunt and put into the boiling water bath for 10 minutes. Once the time is done let them sit for a few minutes and then remove and place on a covered counter for no less than 24 hours. Once done Remove the Twist and wash your jar's.

Label and Store.

Disclaimer: This is not an all inclusive recipe for making jam. You should have a basic knowledge and understanding of the canning process before proceeding. Please consult your local Agricultural Extension Service for additional information.

7.13.2017

Cherry with Crystallized Ginger Jam

Cherry Ginger Jam I have yet to run out of idea's for the cherries. I received my yearly box from the NW Cherry Growers. Cherry Jam with a nice cup of Crystallized Ginger sounds pretty terrific to me.  The day my box arrives I am so ready. Pa and I sit and anticipate the wonderful Jam's and concoctions we can make from these wonder nuggets. Well I could go on all day but let's get started Jammin'


Ingredients

8 cups of clean, pitted, chopped cherries
1/4 cup fresh lemon juice
2 teaspoons ginger powder
3/4 cup crystallized ginger
2 cups of sugar


Start by putting your cherries and lemon juice in a large non-reactive pot. Stir on a medium heat while smashing your cherries to the consistency you like. I like nice pieces of fruit in my jam's. Keep stirring the cherries keeping the heat at bay so as to not burn or scorch your jam. Never ever ever make jam without having the time and patience to enjoy the process. 


 Now you can add you Ginger Powder one teaspoon at a time making sure it blends into the cherries. Next you can add one cup of the sugar and stir to incorporate well.


This is going to be the time to add the crystallized ginger before you add the last cup of sugar. Stir, stir, stir cha cha cha ! Ok let's add that last cup of sugar and get the jam up to a rolling boil that cab not be stirred down.


You can just see the small little chunks of ginger.


This is going to be Cherrylicious


Now that everything is having a party in our pot we need to get the temperature up to 223. This temperature will bring your jam (most of the time) to a gel point. I put my thermometer into the jam about 10 minutes prior to the water-bath.


How beautiful is this jam. I note that Cherry Jam is one of the deepest colored jam I do. And the flavor is so very rich. Alright it is time to jar up this beauty. Take your warm jar's and full them to a 1/2 inch from the rim of the jar. Wipe the rim of the jars clean and place the top and twist on. Give your jar's a 12 minutes water-bath.


Once they have taken their bath remove the warm jars from the pot and place them on a towel covered counter. Let them cool for 24 hours and then remove the twist clean your jars. Dry your jar and label with type of jam and date you preserved them.. Store them in a cool area.

Disclaimer: This is not an all inclusive recipe for making jam. You should have a basic knowledge and understanding of the canning process before proceeding. Please consult your local Agricultural Extension Service for additional information.

7.09.2017

Cherry Maple Jam

Cherry Maple Jam this is a wonderful Jam. Simple and the flavor of the sweet cherries and pure maple syrup just compliment one another delightfully. I was sitting with Pa and going over some idea's for Cherry jam and we both knew that many people use Bourbon with their Cherry recipes but we did not want to incorporate liquor in the jam.


So we thought brown sugar good idea.  Then BAM Maple Syrup yes indeed what a grand thought. Thus the Maple-licious Jam was born.

This great jam would not be possible without the cherries I was sent from the NW Cherry Growers. 
Every year I am blessed to be a part of the Canbassador Program and delight in sending them new and creative idea's on what to do with their bounty of deliciousness.

Ingredients

Makes app. 6 to 10 half pint jars

8 cups clean, pitted and chopped cherries
1 cup pure maple syrup
1/4 cup fresh lemon juice
1 cup dark brown sugar


Begin by putting you clean pitted cherries into your pot with the lemon juice. Keep these on a low to medium heat while they soften up. Smash as needed to get some juice out of your cherries.  The pits you miss and I always miss pits they do not float so you should be able to feel them while you are creating your jam. Just grab them with a spoon like I have. Look to the left I use a potato masher and this is how I find most of the sneaky pits.


Next add your Maple Syrup and stir together. You want that flavor of the maple syrup to wander through out your cherries. Once this is  incorporated add your brown sugar. Keep this at a good rolling boil.


Once you have everything nicely mixed keep your jam at a rolling boil one you can not stir down. Keep this boil and stirring process going until you have brought your jam up to a temperature of 223. This should make a nice set to your jam.


 Now it is time to put this delicious jam into the jars.


Fill your warm jar to 1/2 inch from the top of the jar. Wipe the rims clean and put on the lid and twist. Place the jars into the water-bath and let them stay at a boil for 15 minutes. Once done remove the hot jars an place on a towel covered counter for 24 hours. Once cooled remove the twist and clean the jars. Label and place in a cool dry area.

Disclaimer: This is not an all inclusive recipe for making jam. You should have a basic knowledge and understanding of the canning process before proceeding. Please consult your local Agricultural Extension Service for additional information.

Cherry Strawberry Jam


Well it is Canbasador time of the year. Each year the Washington Fruit Board and NW Cherry Growers they send me fresh cherries from their wonderful farm's. I am then tasked with making a few new recipes for them and you.  In the past I have gotten pretty creative as to not do the usual. This year I realized that I never used that fruit we are so blessed with fresh off the Oxnard Strawberry Farmlands.


So with that little history let us get started on our Cherry Adventure. A few notes we do not use pectin I go by temperature to bring my jams up to set. But if you choose to use pectin just use the box directions.

Ingredients - Yields app 8 half pint jars

8 cup cleaned pitted cherries
4 cups cleaned chopped strawberries
1/4 cup fresh lemon juice
2 cups granulated sugar


Pit and clean your cherries. You can chop them by hand or food processor. My way of making jam is really letting the cherries do their thing. They will soften and then I will take my potato masher and crush them. I love chunky jams. If you get a nice piece of fruit Yippee!

While the cherries cook on a medium heat clean and chop your strawberries. Before you start that add your lemon juice the cherries may need some liquid. The cherries will begin to break down and with that you will get juice.


Now add you strawberries and half of your sugar. Smash and stir is the name of the game. My process of making jam over the years has evolved as you will notice if you have used this site. I use to do the Wam Bam Make in Jam method. But I have learned the slow process works and my jams are quite delicious.

I sure do know how hard it is when time is so short these days and between work, kids and life itself it can be something of a chore to do anything slowly.


When you have the consistency you like it is time to add the remaining sugar.  I will then cook my jam on a rapid boil I can not stir down until I get my jam up to a temperature of 223 this will almost always get me to the gel stage. You can check in various ways. If you do not want to turn off the jam use the spoon in the freezer method.

I can turn my jam off and let it sit for few minutes and it will almost always get that gel topping that tells me it is ready to jar up.


Once your jam has set you are ready to jar it up. Take your warm jars and pour your warm jam into the jar leaving a 1/2 inch from the rim of the jar.  After you have filled all your jar's wipe the rims clean and put on the top and twist. Put your jar's into a boiling water bath and let them boil for 12 minutes.

Once done remove your jar's and place them on a towel covered counter. Let your jars rest for 24 hours remove the twist, clean your jars, label, and store. Do not store with the twist on.


Disclaimer: This is not an all inclusive recipe for making jam. You should have a basic knowledge and understanding of the canning process before proceeding. Please consult your local Agricultural Extension Service for additional information.

6.16.2015

Cherry Blueberry Jam

 
Well this Cherry Jam experiment is just getting better every day. I cannot seem to stop loving all the way's I have chosen to create new cherry jam's. Now do not get me wrong people have made plenty of Cherry Jam's on the Web but mine take it one step further.

Here I have taken the Cherry and added it's friend the Blueberry making a dark warm Jam truly a gift to your toast.


Or on top of a big bowl of Vanilla Bean Ice Cream. Yup ! Oh yes again let us thank The Washington Fruit Commission and Sweet Preservation for their cherries and trust in my ability to make them Cherry Happy.

Ingredients

4 cups of cherries
3 cups of blueberries
1 lemon
4 cups of sugar


Clean, pit and cut your cherries in half. Now rinse them again. Chop your cherries to the consistency you like. We all know I love thick jam. When you are cooking them the skin will dissipate a bit. Watch for pit's. They do not float like citrus seeds. 


Cut your lemon and squeeze the dickens out of it. I squeeze it right into the jam when cooking. Watch for seeds. 


Start you batch by putting your clean chopped cherries into a non-reactive pot and turn the flame on medium heat.


Add you 3 cups of Blueberries and your lemon juice.


 By now you have your blueberries and lemon added and have your jam going at a nice simmer. Time to add your sugar. Bring the jam mixture up to a rolling boil and add your sugar one cup at a time. Between cup's stir and let the sugar dissolve prior to adding another cup. Do this until all the sugar is added and then bring it back up to a rolling boil.


Gel times differ if you use no pectin or pectin. No pectin needs to be brought up to a boiling point of 223 degrees. Pectin is to the boiling point. Here is a pectin not pectin link to help you if needed.


Now it is time to scrap the foam off and get to jarrin' up. Turn off the burner and let your jam sit for 5 minutes this helps the fruit not to float to the top of the jar once water-bathed. Scrap off the foam and have your jars ready.  Ladle into 1/2 pint jelly jars till 1/4" from the top of the jar. Wipe your jars clean and cap and water bath them for 12 minutes.


Take the jams out of the water bath and let them cool overnight. Once cooled take  the ring off wash and store in a cool spot. Your jam's will be good for 6 to 9 months. Once open put them in the refrigerator and enjoy.

Disclaimer: This is not an all inclusive recipe for making jam. You should have a basic knowledge and understanding of the canning process before proceeding. Please consult your local Center for Home Preservation for additional information and available classes.

Cherry Jam with Cinnamon & Ginger


Cherry Jam with Ginger and Cinnamon it is almost like pie on toast! Well here is the second in a series of Cherry-licious Jam Recipes. And again let us thank The Washington Fruit Commission and Sweet Preservation for their cherries and trust in my ability to make them Cherry Happy.


Well this Cherry recipe had quite a great taste . It was like summer delight marries holiday cheer.

Ingredients

3 pounds cherries
1 lemon
1 tsp of ground cinnamon and 2/ 3 cinnamon pods
1 tablespoon of fresh ground ginger
4 cups of sugar


Clean, pit and cut your cherries in half. Now rinse them again. Chop your cherries to the consistency you like. We all know I love thick jam. When you are cooking them the skin will dissipate a bit. Watch for pit's. They do not float like citrus seeds.


Cut your lemon and squeeze the dickens out of it. I squeeze it right into the jam when cooking. Watch for seeds. 


Grind fresh ginger this gives it a great flavor. If you use powder use only 1 teaspoon.  Ginger is really simple to grind. Use a spoon to scrape the peel off then use a zester or cheese grater the smallest plate on the grater.


Cinnamon can be ground but for the easy way let us just use a teaspoon of already ground and some fresh cinnamon sticks.


Start you batch by putting your clean chopped cherries into a non-reactive pot and turn the flame on medium heat.


Add you ground ginger and powder cinnamon. Not the Sticks Yet!  Smash your cherries while they are cooking the juice is thick and dark. There are a few ways of doing this. You can mush or use an immersion blender while they are cooking. They do thin out while cooking no matter how you cut them.


Look at that beautiful juice in the pot. While the cherries are cooking down add your cinnamon sticks. Keep stirring.


The cinnamon sticks get added last because they get in the way. It does not take long for the flavor to come out of them.


By now you have your lemon, ginger and cinnamon added and have your jam going at a nice simmer. Time to add your sugar. Bring the jam mixture up to a rolling boil and add your sugar one cup at a time. Between cup's stir and let the sugar dissolve prior to adding another cup. Do this until all the sugar is added and then bring it back up to a rolling boil.


 Gel times differ if you use no pectin or pectin. No pectin needs to be brought up to a boiling point of 223 degrees. Pectin is to the boiling point. Here is a pectin not pectin link to help you if needed.


Now it is time to scrap the foam off and get to jarrin' up. Turn off the burner and let your jam sit for 5 minutes this helps the fruit not to float to the top of the jar once water-bathed. Scrap off the foam and have your jars ready.  Ladle into 1/2 pint jelly jars till 1/4" from the top of the jar. Wipe your jars clean and cap and water bath them for 12 minutes.


Take the jams out of the water bath and let them cool overnight. Once cooled take  the ring off wash and store in a cool spot. Your jam's will be good for 6 to 9 months. Once open put them in the refrigerator and enjoy.

Disclaimer: This is not an all inclusive recipe for making jam. You should have a basic knowledge and understanding of the canning process before proceeding. Please consult your local Center for Home Preservation for additional information and available classes.


6.13.2015

Cherry Jam with Fresh Vanilla


Cherry Jam what a treat. Cherry Jam with Vanilla added well a Cherry Bonus. I was honored to be asked to be a part of the Cabassador Program that the Washington State Fruit Commission runs through The Art of Loving Fruit at Sweet Preservation. Many have gone before me and I can only hope my Cherry Jam holds up to the standards.


This little project took a lot of research and time. I wanted to make sure that we had some recipes that the Internet has not flooded yet. The first Cherry Jam recipe I did was a Cherry Jam with Vanilla.


Vanilla is my friend. I currently make my own Vanilla Extract and always have ground up pods from the extract. The pods  have a great flavor along with the inners of a fresh vanilla pod just took this jam to the next level. The cherries that I received from Washington had to be the sweetest juiciest cherries this preserver has ever had. I was able to cut the sugar in this jam and those little dark delights held their own. 


Well here are your ingredients and please make sure everything is ready prior to your preserving. This will make you approximately 6 half pint jars of jam.

Ingredients


3 pounds cherries
1 lemon (juice and zest)
2 fresh vanilla pod's
1 tbsp of vanilla powder (optional)
4 cups of sugar

Pre work is simple.

Clean, pit and cut your cherries in half. Now rinse them again. Chop your cherries to the consistency you like. We all know I love thick jam. When you are cooking them the skin will dissipate a bit. Watch for pit's. They do not float like citrus seeds.

Zest the lemon and add the zest into a separate small container. Cut your lemon and squeeze the dickens out of it. Add this to your container. Watch for seeds.

Split and scrap your vanilla beans keep the pods you will add them to the jam once it is cooking.


Start you batch by putting your clean chopped cherries into a non-reactive pot and turn the flame on to medium.


Smash your cherries while they are cooking the juice is thick and dark. There are a few ways of doing this. You can mush or use an immersion blender while they are cooking. They do thin out while cooking no matter how you cut them.

Look at that beautiful juice in the pot. While the cherries are cooking down add your lemon mixture. Keep stirring.


Now you can add your vanilla ingredients. I added the pod along with my vanilla scrapping. You split the pod down the middle and scrape the goo out. 
I add the ground vanilla. I make my own vanilla extract and grind the pod after it has been made. 
Stir this in and let it simmer.
My jam will simmer for about an hour. Stirring often through out this process.


I do not use pectin in most of my jam's. After the simmer time I bring my jam up to a rolling boiling this process will gel my jam with no pectin. My grandma taught me this.  

You can use box pectin use this recipe with the pectin box directions. You will have to use a lot more sugar.


Alright by now you have your lemon and vanilla added and have your jam going at a nice simmer. Time to add your sugar. Bring the jam mixture up to a rolling boil and add your sugar one cup at a time. Between cup's stir and let the sugar dissolve prior to adding another cup. Do this until all the sugar is added and then bring it back up to a rolling boil.


Gel times differ if you use no pectin or pectin. No pectin needs to be brought up to a boiling point of 223 degrees. Pectin is to the boiling point. Here is a pectin not pectin link to help you if needed.


Now it is time to scrap the foam off and get to jarrin' up. Turn off the burner and let your jam sit for 5 minutes this helps the fruit not to float in your jam once canned. Ok scrap off the foam and have your jars ready.  Ladle into 1/2 pint jelly jars till 1/2" from the top of the jar. Wipe your jars clean and cap and water bath them for 12 minutes.


Take the jams out of the water bath and let them cool overnight. Once cooled take the ring off wash and store in a cool spot. Your jam's will be good for 6 to 9 months. Once open put them in the refrigerator and enjoy.

Disclaimer: This is not an all inclusive recipe for making jam. You should have a basic knowledge and understanding of the canning process before proceeding. Please consult your local Center for Home Preservation for additional information and available classes.